Film photographers who scan their negatives face a common challenge: transforming those orange-tinted RAW files into vibrant positive images. Negative Lab Pro, a Lightroom plugin, brings good quality color conversions directly into your workflow with just a few clicks.
Part 0: Understanding My Workflow
Converting film negatives requires organization and precision. I break down my process into six distinct phases, each building upon the previous step to achieve professional results. These techniques work universally for me, whether I’m scanning with a dedicated film scanner or using my camera setup.
My workflow covers everything from initial file import to final export, including metadata management, white balance correction, and batch processing. I’ll use CineStill 800T as an example to demonstrate how I handle challenging tungsten-balanced films with their characteristic halation effects.
Part 1: How I Import RAW Files with Proper Organization
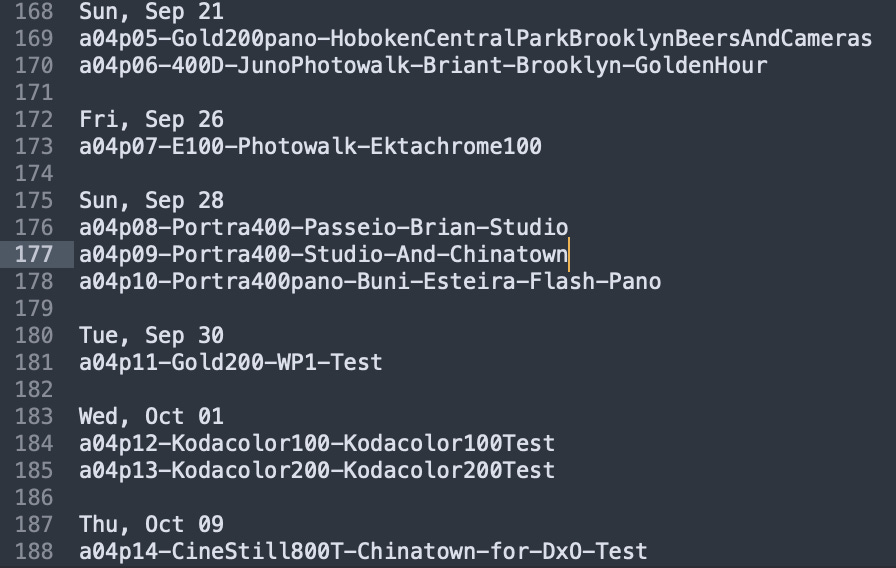
My organization starts even when Lightroom remains closed. I maintain a text file called “the great film scan log” where I document everything I’ve scanned so far. For each scanning session, I record the date, storage location (album and page number), film stock name, and subject matter. This metadata becomes invaluable when I’m searching among thousands of negatives months or years later.
I establish my folder structure on my computer, then drag the entire folder into Lightroom using the “Add” import method instead of “Copy.” This prevents file duplication, saving precious storage space. My DSLR or scanner files remain in their original location as Lightroom catalogs them.
I populate my metadata fields immediately, keeping all images selected. I record camera body, lens make and model, film stock, and ISO rating. Negative Lab Pro adds film-centric metadata sections to Lightroom, which helps me catalog and organize my film shots more effectively. I fill these fields now because when I move photos between systems, this information travels with them.
Part 2: Crop, Flip, and White Balance Operations
Raw negative scans often require flipping because scanning from the emulsion side reverses the image. Select all imported files, switch to the Develop module (press D), and enable Auto Sync. Navigate to Transform > Flip Horizontal to correct all images simultaneously.
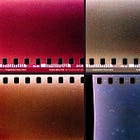
White balance sampling from the film border provides consistent color temperature across an entire roll. Select the white balance tool and click any area of the film border from a frame without light leaks. This single sample applies to every frame via Auto Sync, establishing a baseline for the conversion process. If no film border is visible, use Auto WB as an alternative.
PRO-TIP: If you scan panoramas where there’s no film border because the photo spans across the sprocket holes, remember to take a picture of the blanked frame space before the photos start in the film roll.
Apply an initial crop to all frames at this stage. Manual scanning processes produce slight variations in negative positioning, but establishing a rough crop eliminates most film borders and holder edges. You can refine individual crops later, though this preliminary step ensures Negative Lab Pro analyzes only the actual image area.
Part 3: Negative Lab Pro Initial Conversion
Select all prepared images and disable Auto Sync when opening Negative Lab Pro. The border buffer setting determines how much edge information the plugin excludes from its analysis. Black film borders skew the algorithm’s calculations, so set the border buffer to trim these areas without removing actual image content.
The conversion dialog offers several color models: Basic provides neutral interpretation, and Frontier and Noritsu emulate specific commercial lab scanner characteristics. The Frontier model delivers teal-blues, golden yellows, and warm tints, and Noritsu provides similar but less warm results. For black and white negatives, select the B+W model to avoid unwanted color casts.
Negative Lab Pro analyzes each scene individually and converts it appropriately, producing very good color conversions almost instantly. The plugin performs per-image calculations for color grading and dynamics, which can create inconsistencies across a roll shot under varying conditions.
Part 4: Color Uniformity and Individual Minor Adjustments
Examine your images for color consistency following initial conversion, particularly the film lettering. Some frames may render the lettering more yellow and others appear white, indicating different color interpretations by the plugin.
Negative Lab v3.1 Pro do NOT do a very good task of correctly analyzing the roll as a whole thing, I even wrote already it in the below post:
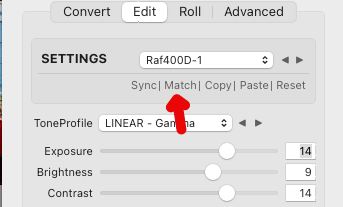
If you think the above text is too TL;DR, the trick is to group images shot under similar lighting conditions. Select these related frames and use the Match feature to synchronize their color profiles. Choose one representative image with balanced RGB values and adequate luminance, then apply Match to unify the selected group. Negative Lab Pro’s batch processing capabilities allow you to select the white balance point once per roll and sync it across shots, with the same approach for crop settings.
Apply presets sparingly for exposure and contrast adjustments instead of color manipulation. Create preset variations for slightly lighter, slightly darker, and neutral exposures to handle exposure differences without excessive individual editing. This approach maintains consistency and accommodates the natural variations in your shooting.
Distinguish between images requiring exposure correction versus those needing color correction. CineStill 800T, a tungsten-balanced film derived from motion picture stock, creates cooler, cinematic hues and the characteristic red halation glow around highlights. When working with this film, focus exposure adjustments on maintaining the tungsten character and avoiding neutralization.
Part 5: Contact Sheet and Export Workflow
Contact sheets provide a visual reference for entire rolls, essential for analog archiving. Export all converted images as JPEGs to a designated folder, maintaining your naming structure. Cloud storage often charges premium rates per gigabyte, so storing DNG files locally and syncing compressed JPEGs to cloud services optimizes costs without sacrificing accessibility.
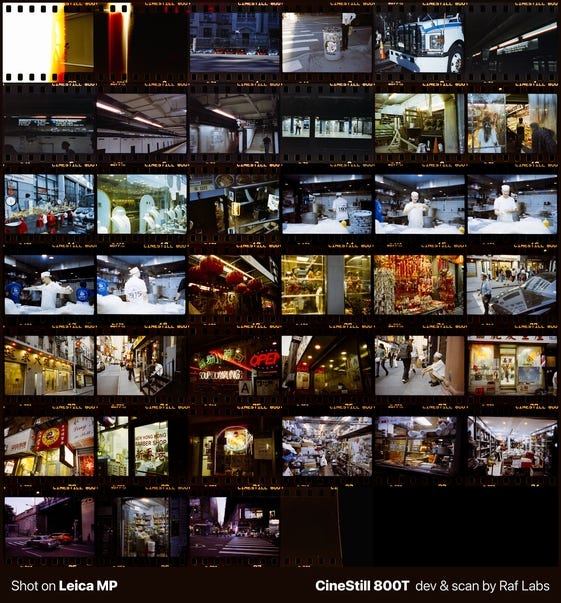
Create contact sheets at high resolution (1280x800 pixels per tile) to allow zooming and detailed inspection. Arrange images in a grid that displays film lettering and frame numbers, maintaining the sequential feel of analog film. This presentation format makes it immediately clear you’re viewing scans from actual film instead of digital files manipulated to look analog.
Alright! Now that you learned my workflow, here are some bonus content!
CineStill 800T Specific Considerations
CineStill 800T produces distinctive characteristics including halation around bright lights, cool blue-green color shifts, and fine grain structure. When converting this film, resist the urge to eliminate these qualities via excessive color correction. The halation serves as a defining characteristic that makes CineStill recognizable, never a defect requiring removal.
This tungsten-balanced film performs best in low-light situations with artificial lighting, though photographers can rate it between EI 200-1000 without push processing and retain highlight and shadow detail. When matching color profiles across a roll, select reference images with mixed lighting that includes both tungsten sources and neutral tones compared to frames dominated by single colors.
The halation effect around bright lights represents the signature look of CineStill 800T. This glow appears because the Remjet layer has been removed from the original motion picture film stock, allowing it to be developed in standard C-41 chemistry. Accept and embrace this characteristic instead of fighting against it during conversion.
Workflow Efficiency Tips
Film photography rewards batch processing and consistent methodology. Develop presets that work across multiple rolls of the same film stock, then create minor variations for exposure compensation. This approach dramatically reduces per-image editing time and maintains professional results.
The non-destructive RAW workflow means you can reconvert or edit differently from scratch without retaining multiple copies of every negative or rescanning. Store your DNG files with applied Lightroom edits, and you’ll always be able to return and reprocess if your aesthetic preferences change.
Match lighting conditions instead of individual frames. Images shot in a restaurant require different treatment compared to street photography from the same roll. Process these groups separately, applying the Match function to each lighting scenario for consistent results within each environment.
Common Mistakes to Avoid
Avoid selecting reference images with strong color casts when using the Match function. A frame dominated by red tones will push all matched images toward red, creating unnatural results. Choose balanced frames with representative RGB values and good tonal distribution.
Images with excessive red, blue, or any single dominant color make poor reference candidates. A street scene with balanced elements across the frame works far better than a sunset filled with orange hues or a sky dominated by blue tones. The algorithm needs neutral reference points to make accurate calculations.
Never forget to disable Auto Sync when opening Negative Lab Pro, or every adjustment you make will apply across all selected images. The plugin includes its own sync functionality designed specifically for negative conversion workflows.
Resist excessive individual editing. Film photography embodies a certain spontaneity and acceptance of imperfection. Chase extreme perfection on every frame and you’ll lose the efficiency that makes analog workflows sustainable for large archives.
Storage and Archive Considerations
RAW DNG files from medium format cameras or high-resolution scanners can reach 9000x8000 pixels or larger. Store these master files locally on redundant drives and maintain JPEG exports in cloud services for accessibility and sharing.
Create a clear folder hierarchy that mirrors your physical negative storage. When someone asks about a specific shoot three years later, you should be able to locate both the physical negatives and digital scans within minutes. Album numbers, page numbers, and consistent naming conventions make this retrieval process seamless.
Consider your long-term archival strategy from day one. External SSDs with redundancy protect your master files, cloud services provide accessibility for sharing and remote work, and organized physical negative storage ensures you can always return to the source material.
Real-World Application: Chinatown Scene
Converting an entire roll shot in varied conditions demonstrates these principles in action. Restaurant interiors require one color treatment, outdoor street scenes need another, and subway shots with strong light leaks demand their own approach. Group these scenarios separately and apply the Match function within each lighting environment.
The key lies in recognizing when scenes share enough similarity to benefit from unified processing. Four frames inside a ramen restaurant share lighting characteristics that differ completely from frames shot on the street outside. Process the restaurant group together, then tackle the street photography as its own batch.
Light leaks and extreme exposures at the beginning and end of rolls need special attention. These frames often confuse the automatic analysis, so select them separately and choose a more balanced reference frame from within that group for the Match function.
Bottom line: This systematic approach to negative conversion transforms the potentially overwhelming task of digitizing film into a manageable, repeatable workflow. Negative Lab Pro handles the complex color science, allowing you to focus on organizing, refining, and archiving your analog photography efficiently. Master these six steps and you’ll process rolls consistently, preserve your film’s character, and build an organized archive that remains accessible for years.
What do you think? Would you be interested on seeing my printing workflow?


