


Film simulation is a hot topic nowadays. I observe more and more new software, presets, techniques, LUTs, and everything else that tries to mimic film as much as possible. It’s a trend, and we can’t deny it.
What makes it a bit more curious is the fact that it’s hard to measure accuracy and draw conclusions between digital simulations and real film, simply because there’s a whole world of variables involved in the analog and digital processes.
The images we see nowadays in front of our eyes are mostly manipulated, digital and analog alike (and this is overlooked, it has always been; darkroom printing has been changing how photographs look for a while now).
For film, differences come from developing, scanning, and converting analog silver halide into digital pixels, or simply developing and darkroom printing it.
For instance, analog processes can provide drastically different results based on chemistry freshness, or temperature differences when developing, and I’m not even talking about scanning yet.
That’s why these expensive Lab film developing/scanning machines exist. They are there to standardize these processes as much as possible, which is what a professional Lab needs.
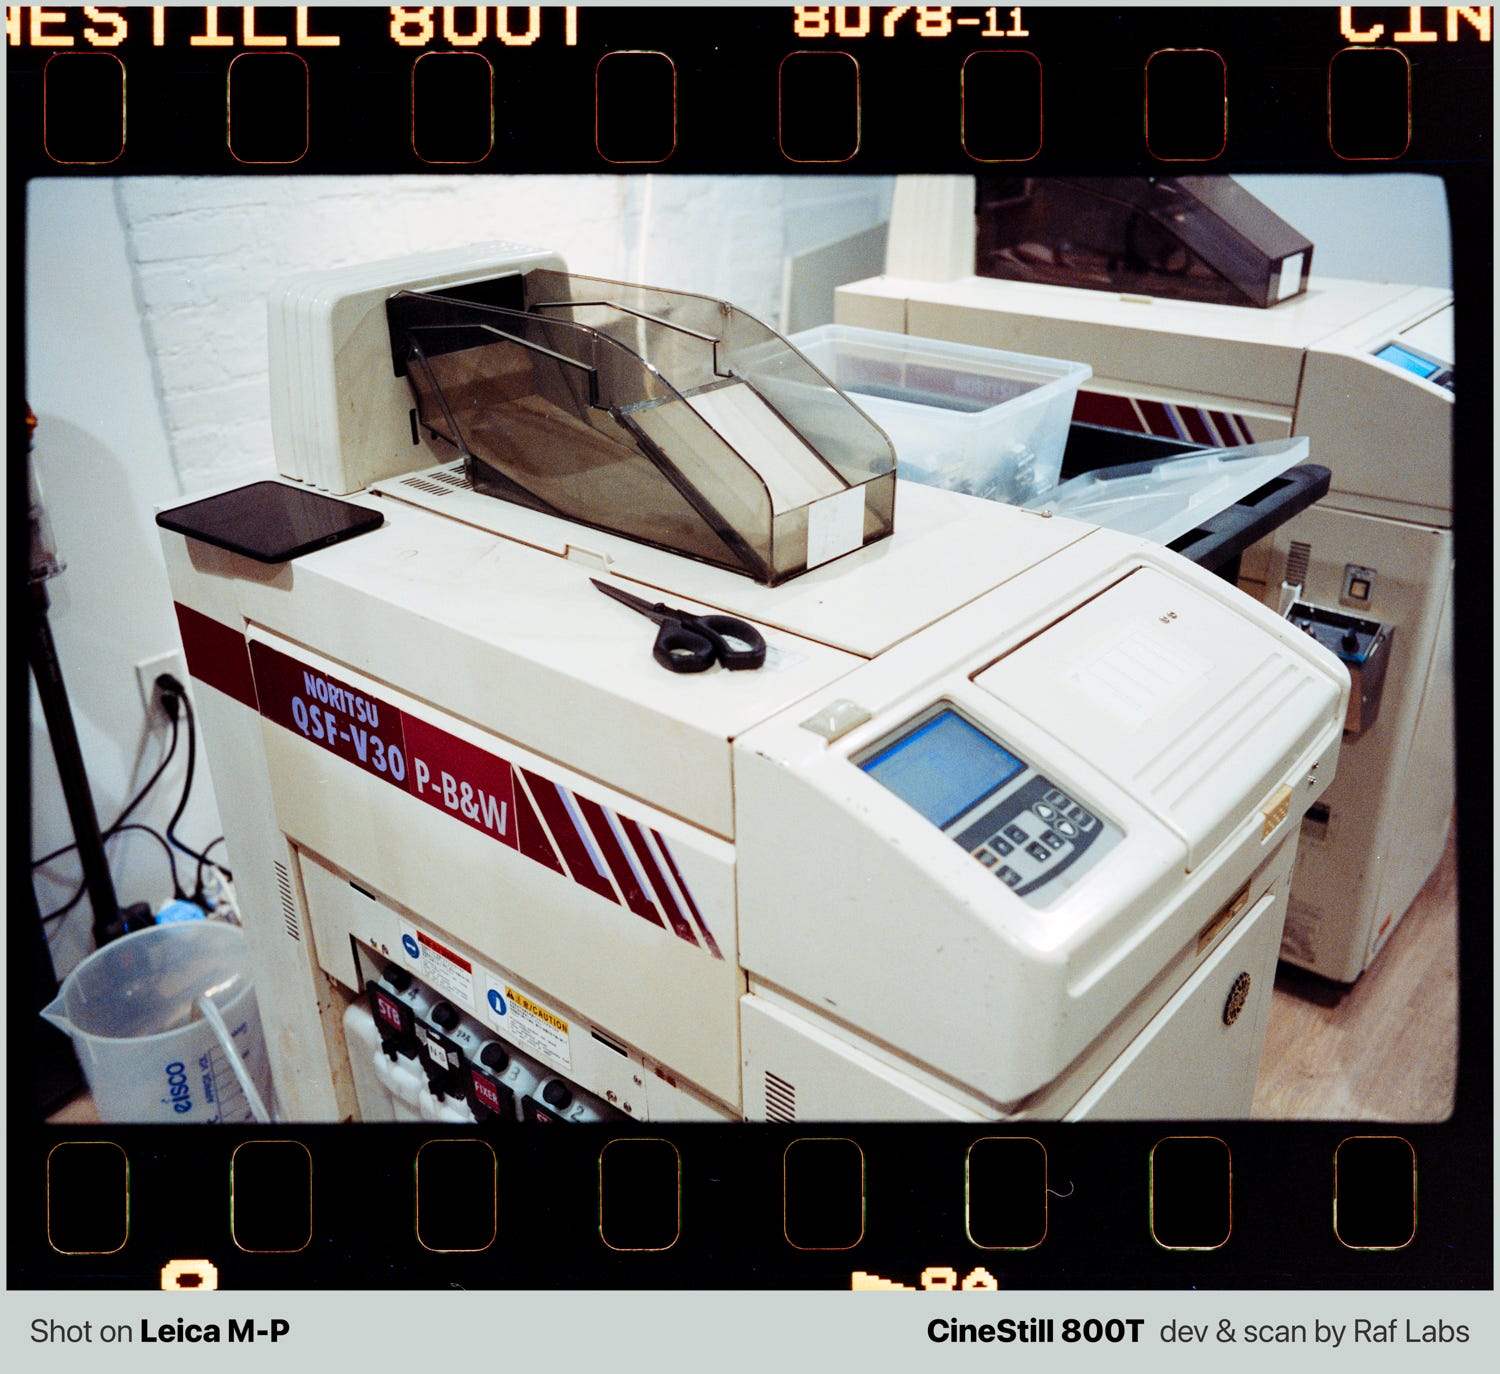
Scanners are also a whole universe. Depending on the way you scan and convert, or the scanner hardware used (Plustek vs. Noritsu vs. Frontier, etc.), you can have different color tones, gamma, and results that look dramatically different from each other.
Professional Labs have scanner calibration, test strips from film manufacturers, and all sorts of ways to try to standardize this. It is appreciated, but I guarantee you that not every Lab is on that level of excellence. There are some that even use Negative Lab Pro and DSLR scanning.
That said, how can we make sure that a specific film simulation preset is accurate? How can we confirm something digitally made is accurate to an analog process that is very prone to changes because of real-world variables?
Short answer: we don’t. Film simulations are in the “best effort” of copying something that is already chaotic and hard to standardize by nature.
Because of that, film simulations are also not something that can be standardized. Fujifilm on-camera film simulations are a little bit more consistent because they're locked into the camera's hardware and firmware, meaning the JPG conversion happens in camera, and all cameras share the same color science, raw file conversions, sensor type, etc, but Lightroom preset packs mimicking a "Portra 400"? Sorry to say, this is just a lie.
Yeah, sorry to say that =/
Things get even worse when these people selling film presets on the internet include “Portra 400 v1”, “Portra 400 v2”, “Portra 400 v3”.
What the hell is that? Portra 400 should be Portra 400, lol.
That's because the sensor that produced that image renders different RAW characteristics. The Portra 400 preset might work well for the camera settings of the author who created it, but apply it to a different camera and it will very likely render differently. If someone sells you a preset that is locked to a specific camera and manufacturer's color science, then it's slightly better.
A personal note from Raf: if I didn’t have good morals and ethics, I would capitalize on all my film experience and I would be trying to sell you preset packs that emulate film. Instead, I prefer to be honest and give you the film simulation for free. It’s only useful if you use Dehancer Film Simulation and have a Hasselblad 907X/CFV 100C, and even then, the results would only be similar to what you’d get if your film was developed, scanned, and converted by RafLabs. Keep reading and you will understand why…
and/or
Back to the subject: to make things even more random, people tend to think of RAW files as a universally calibrated standard that stays exactly the same across all camera models in the world. Well, I'm here to tell you it's not, and it's even different across camera models from the same manufacturer.
This is important to mention, because I notice a hot market in Lightroom and film simulation presets, and again, I need to share my knowledge with avid Camera Clara readers:
Again, don’t fall for these. Especially if they come with the promise of “apply this preset and your files will look like X, Y, Z film”.

That doesn’t mean film simulations are just wrong and impossible of doing
It just means that if you wanna do it, you gotta do it from scratch. Take a look at this extensive test I did. Please watch the video below:
I used the fact that Hasselblad cameras let me swap a film back for a digital one while keeping the very same camera settings and composition, so I went out to Coney Island on a very hot day and ran the ultimate film simulation rundown. I brought a tripod, measured light, locked camera settings, took a film exposure, swapped backs, and took a digital shot. Same lens, aperture, ISO, shutter speed, composition.
Here’s me in action doing this:
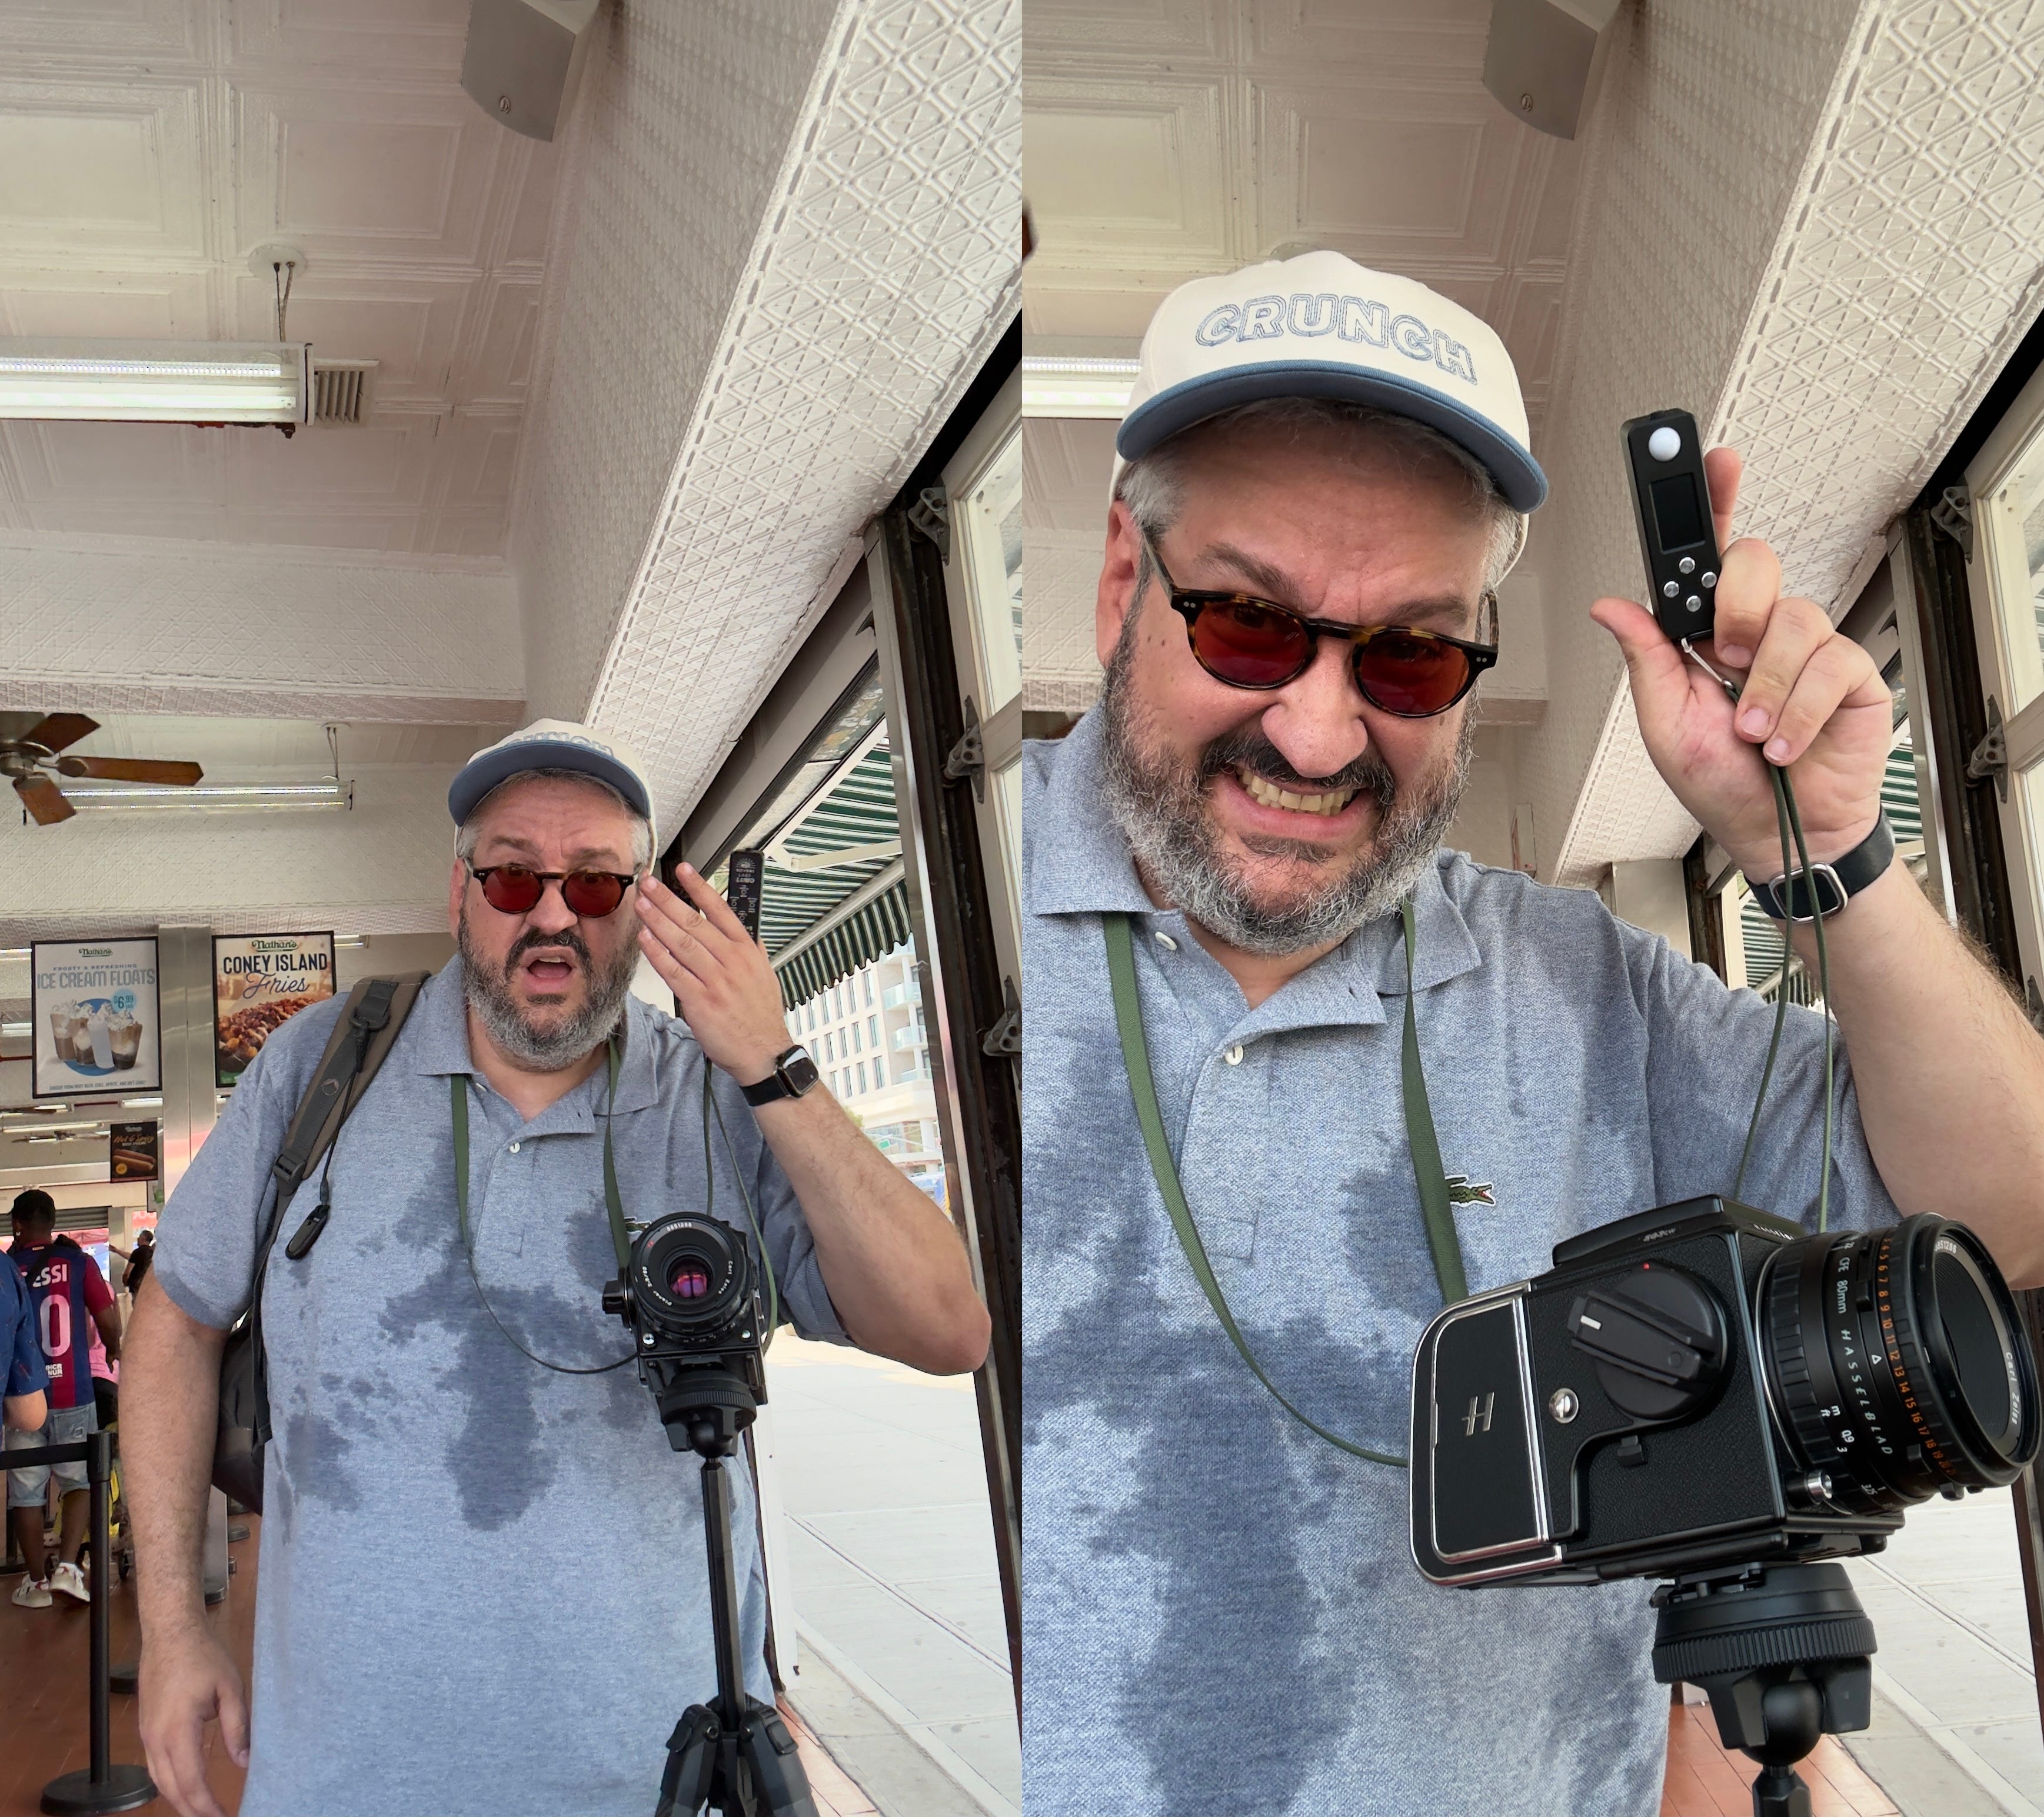
When I came back, I did the dev/scan/convert for the film shots and exported them all to a folder. Then I exported the digital RAW files to Dehancer (a film simulation software), and started fine-tuning my preset according to my film shots, placing them side by side on my monitor and fine-tuning the sliders in Dehancer. I refined the preset as I moved to different files.

If you are interested in Dehancer, I wrote an article about it, you can check it here. Now they have a Desktop version which is super fine.
Dehancer film simulation, a review from a film expert

Last week I was in Brazil. I shot three rolls of Portra 400, came home, developed all three at once, and every single roll came out blank. Bad chemistry. Half an entire trip, gone.

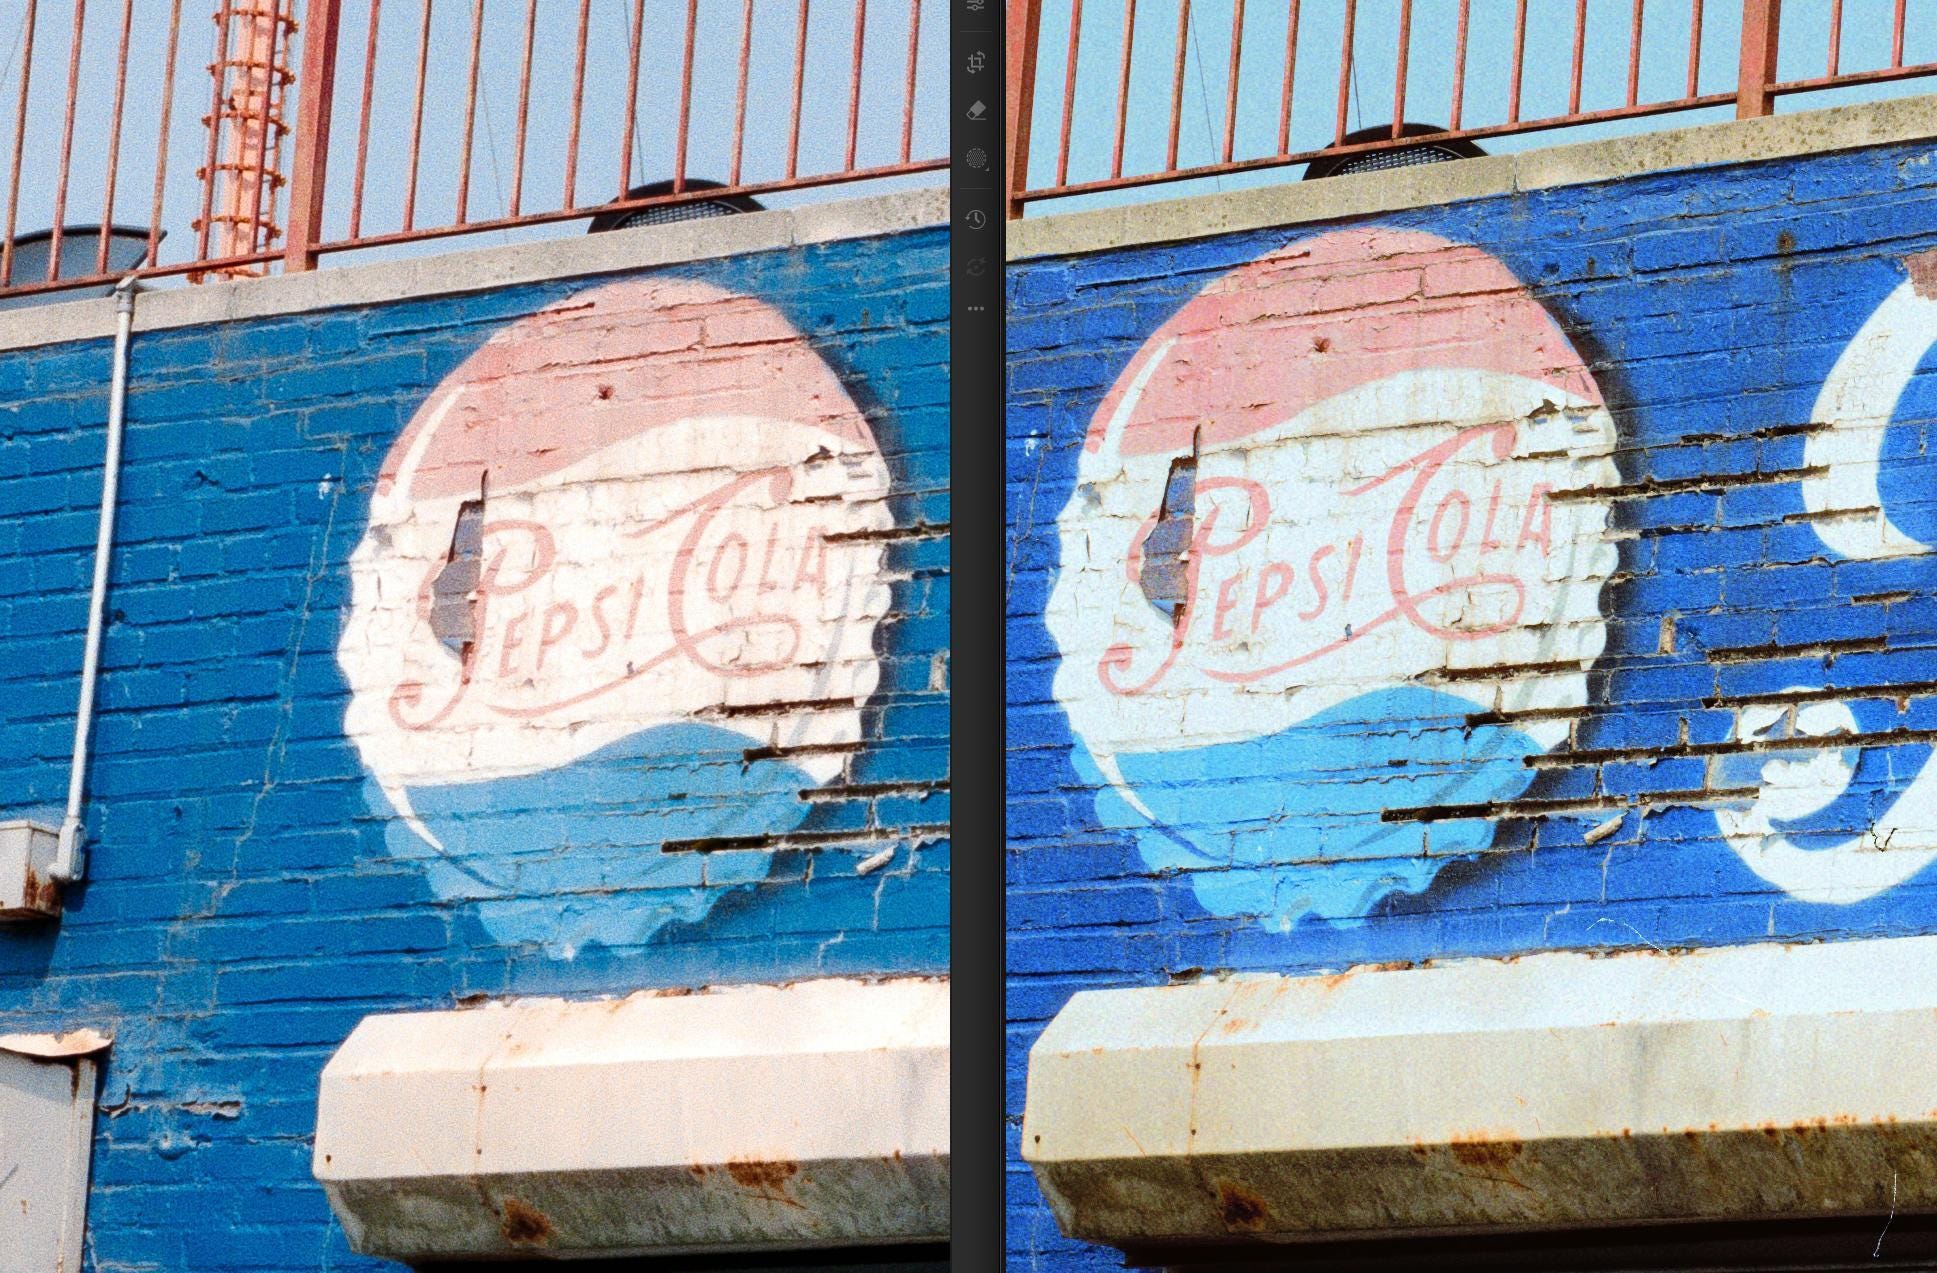
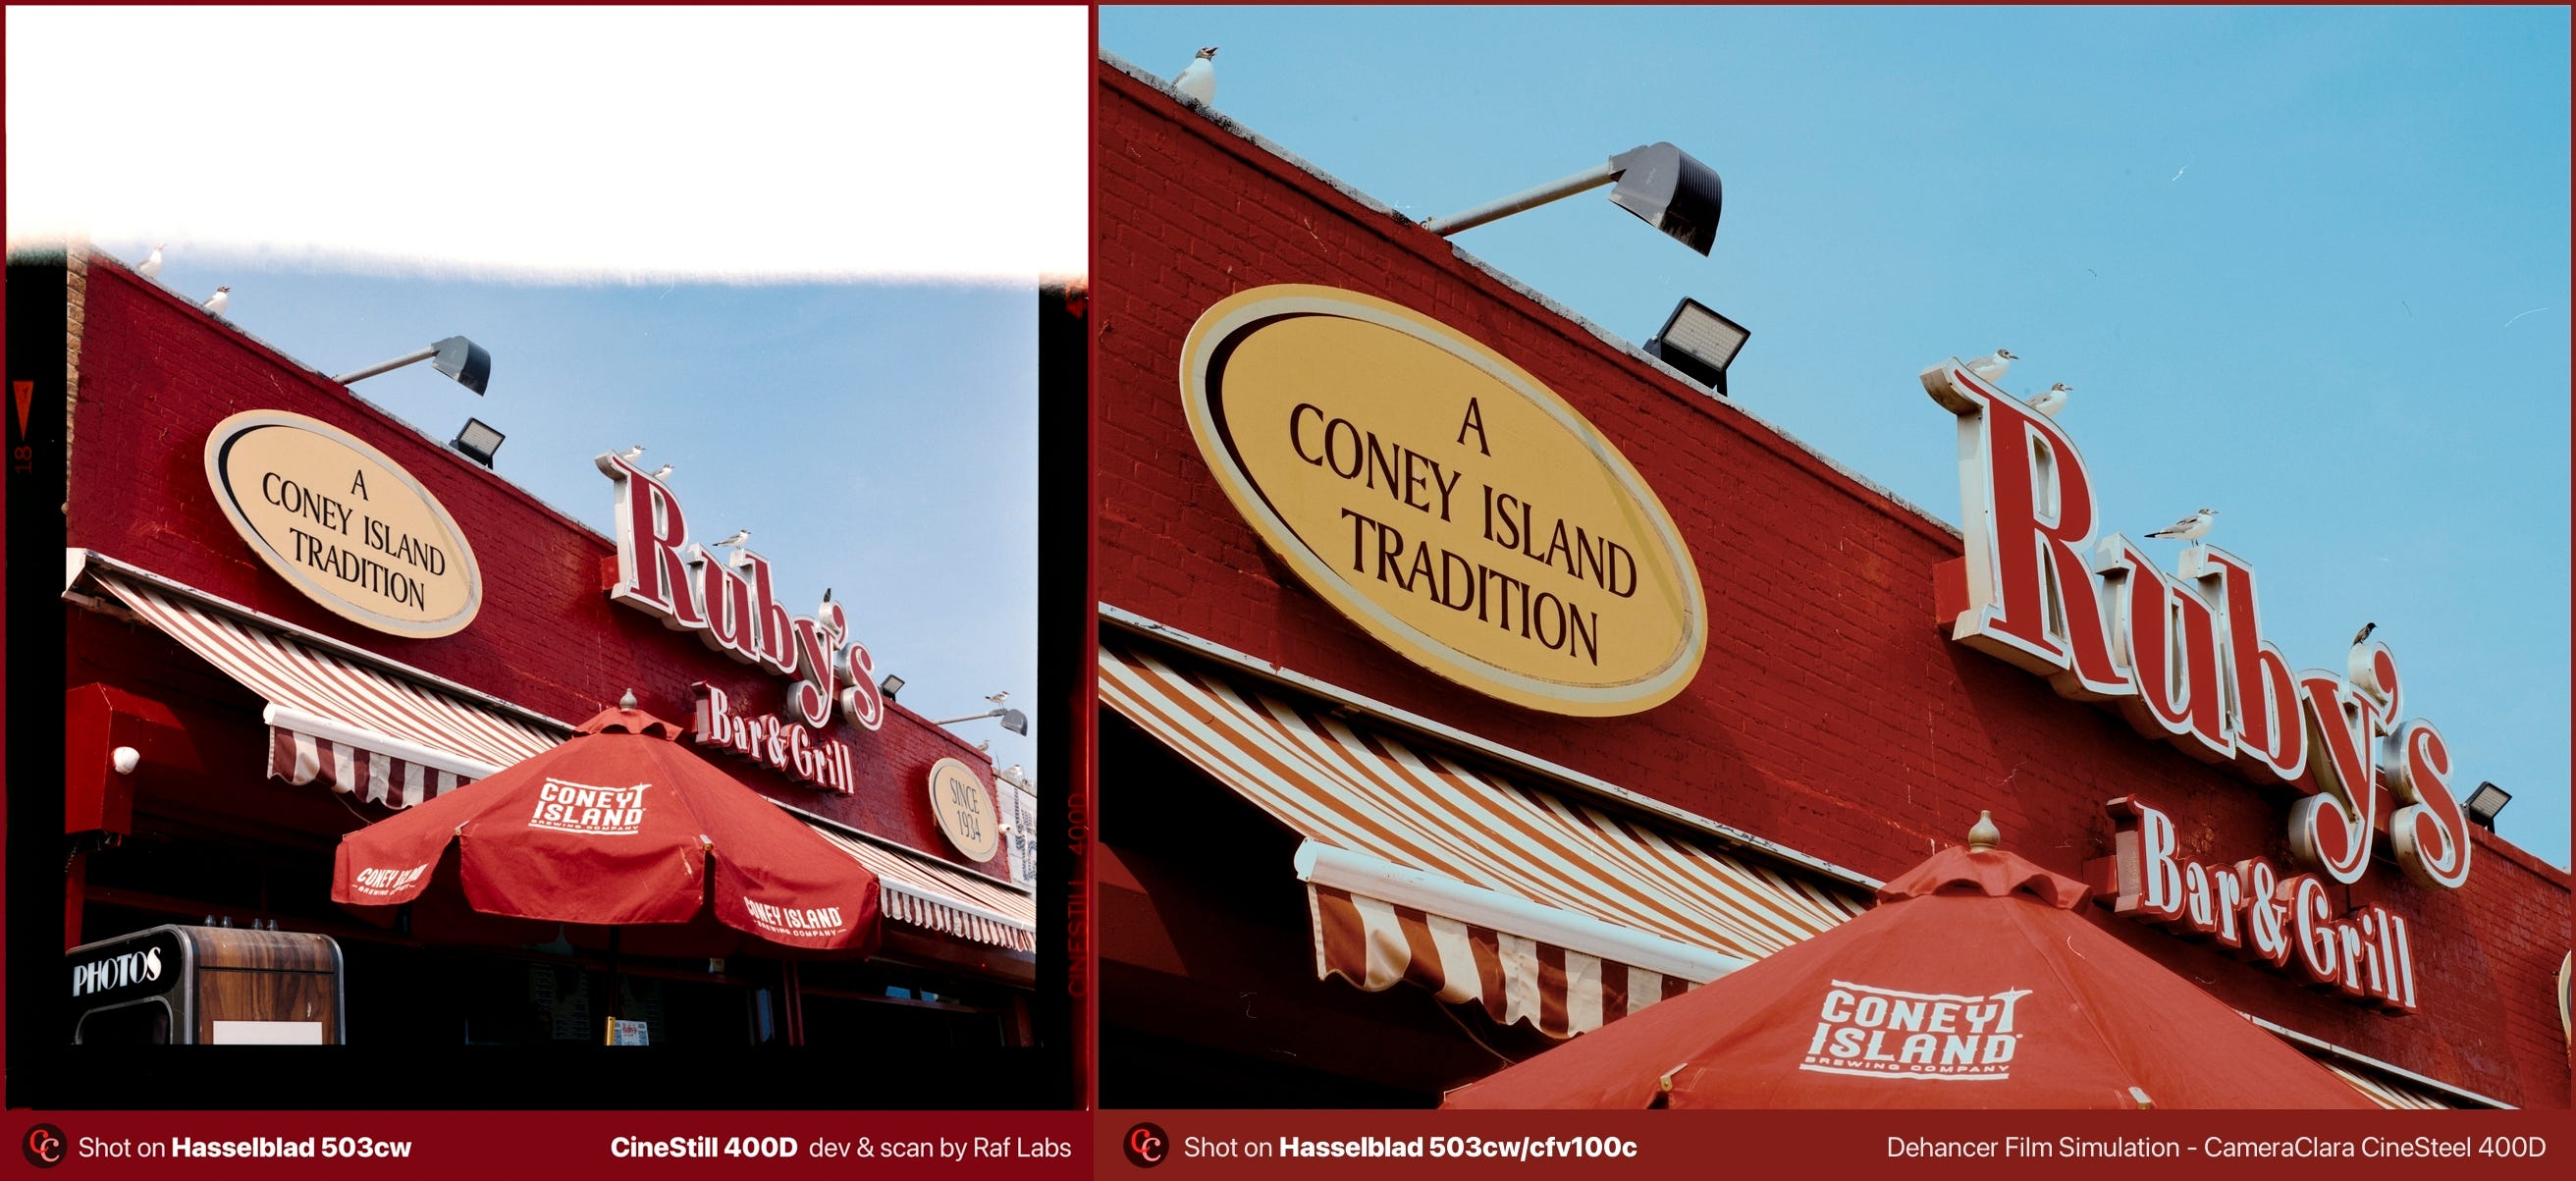
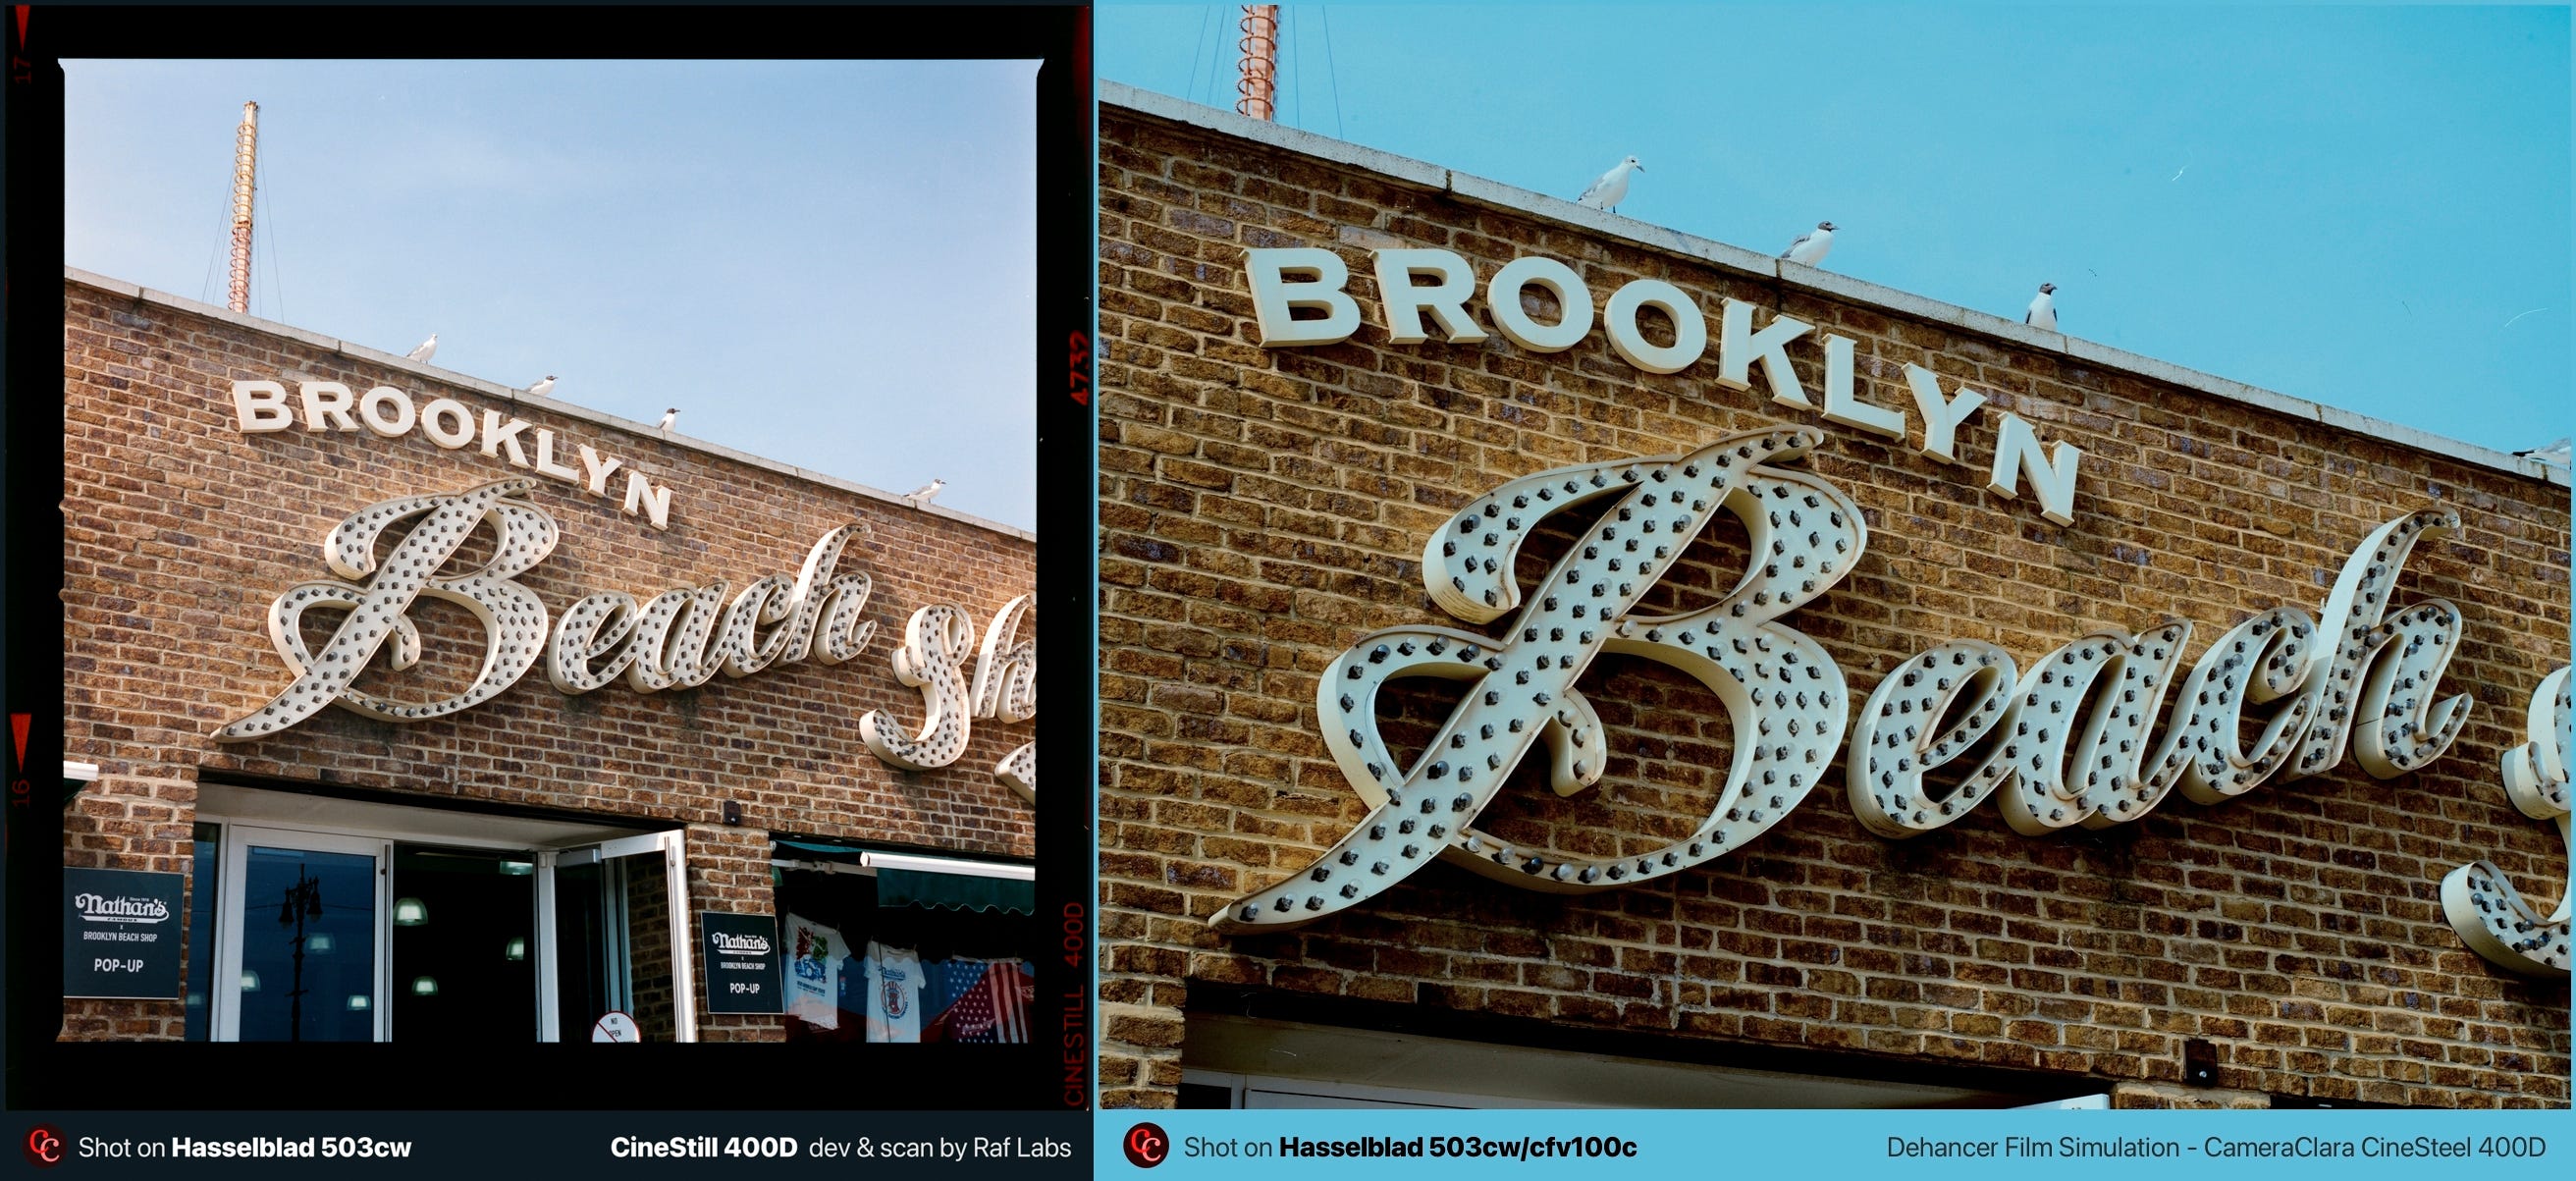
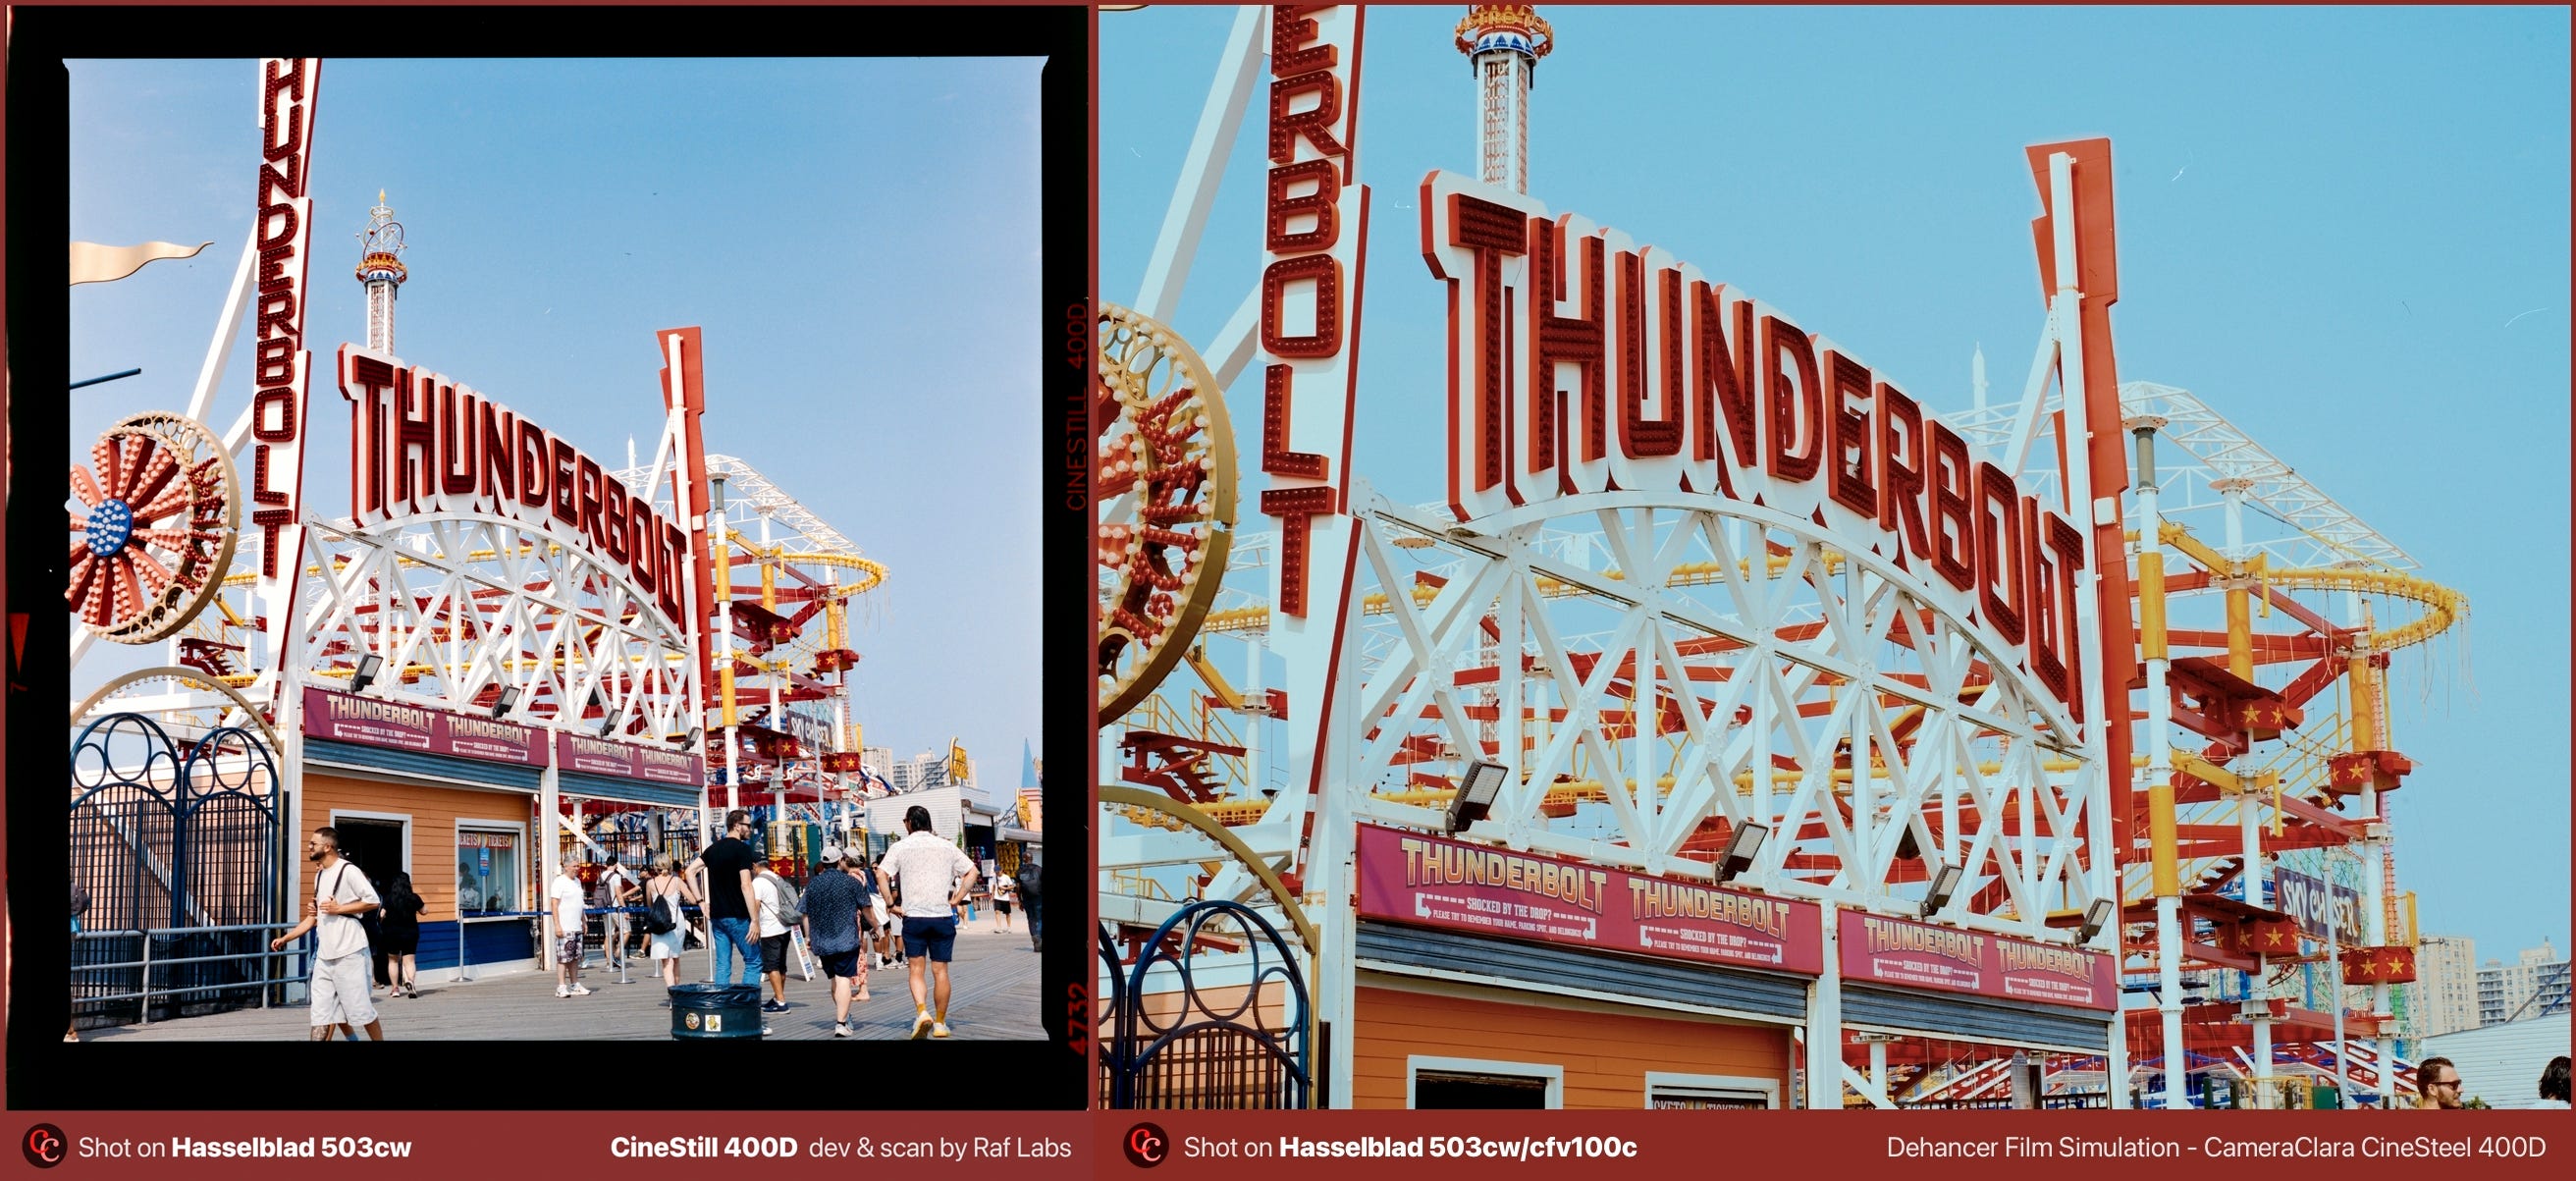
On the left, we have the original CineStill 400D in medium format, taken with my Hasselblad and a film back. On the right, we have my CameraClara CineSteel 400D preset. Color accuracy seems good.

More samples
Let’s analyze the real film with the Dehancer film simulation presets I just created.
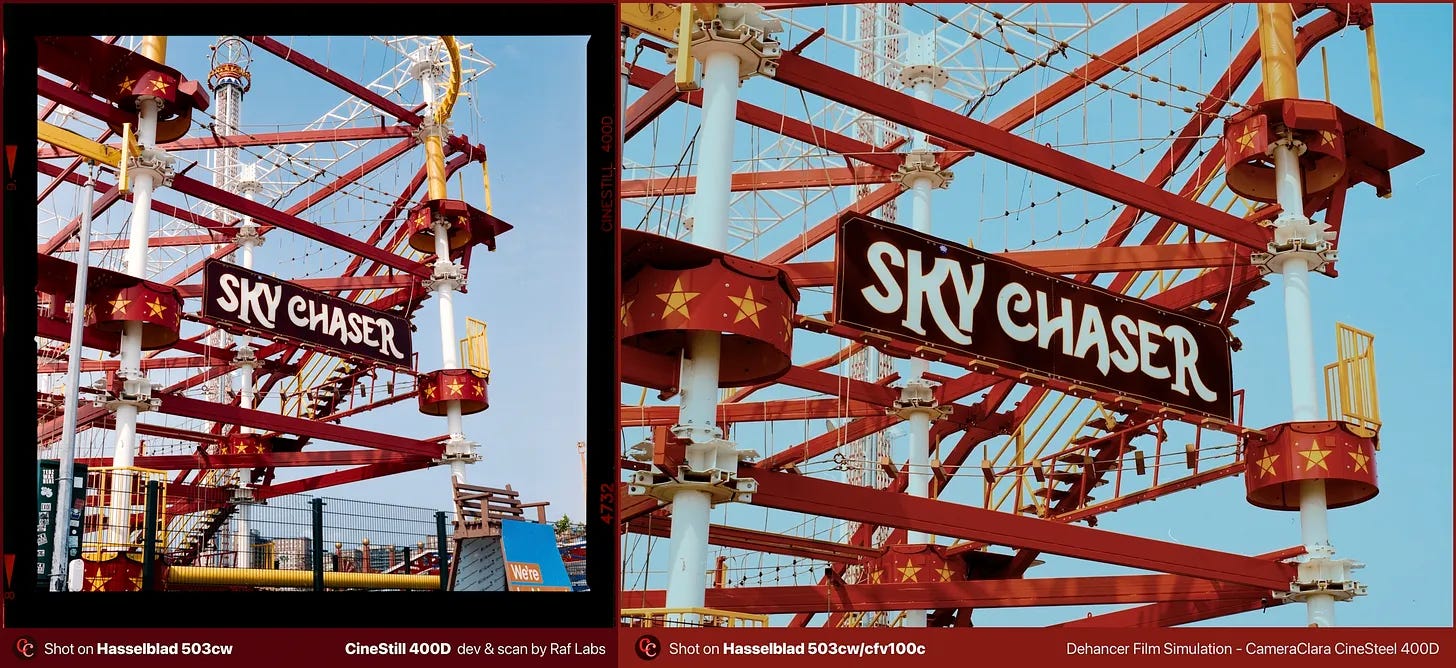
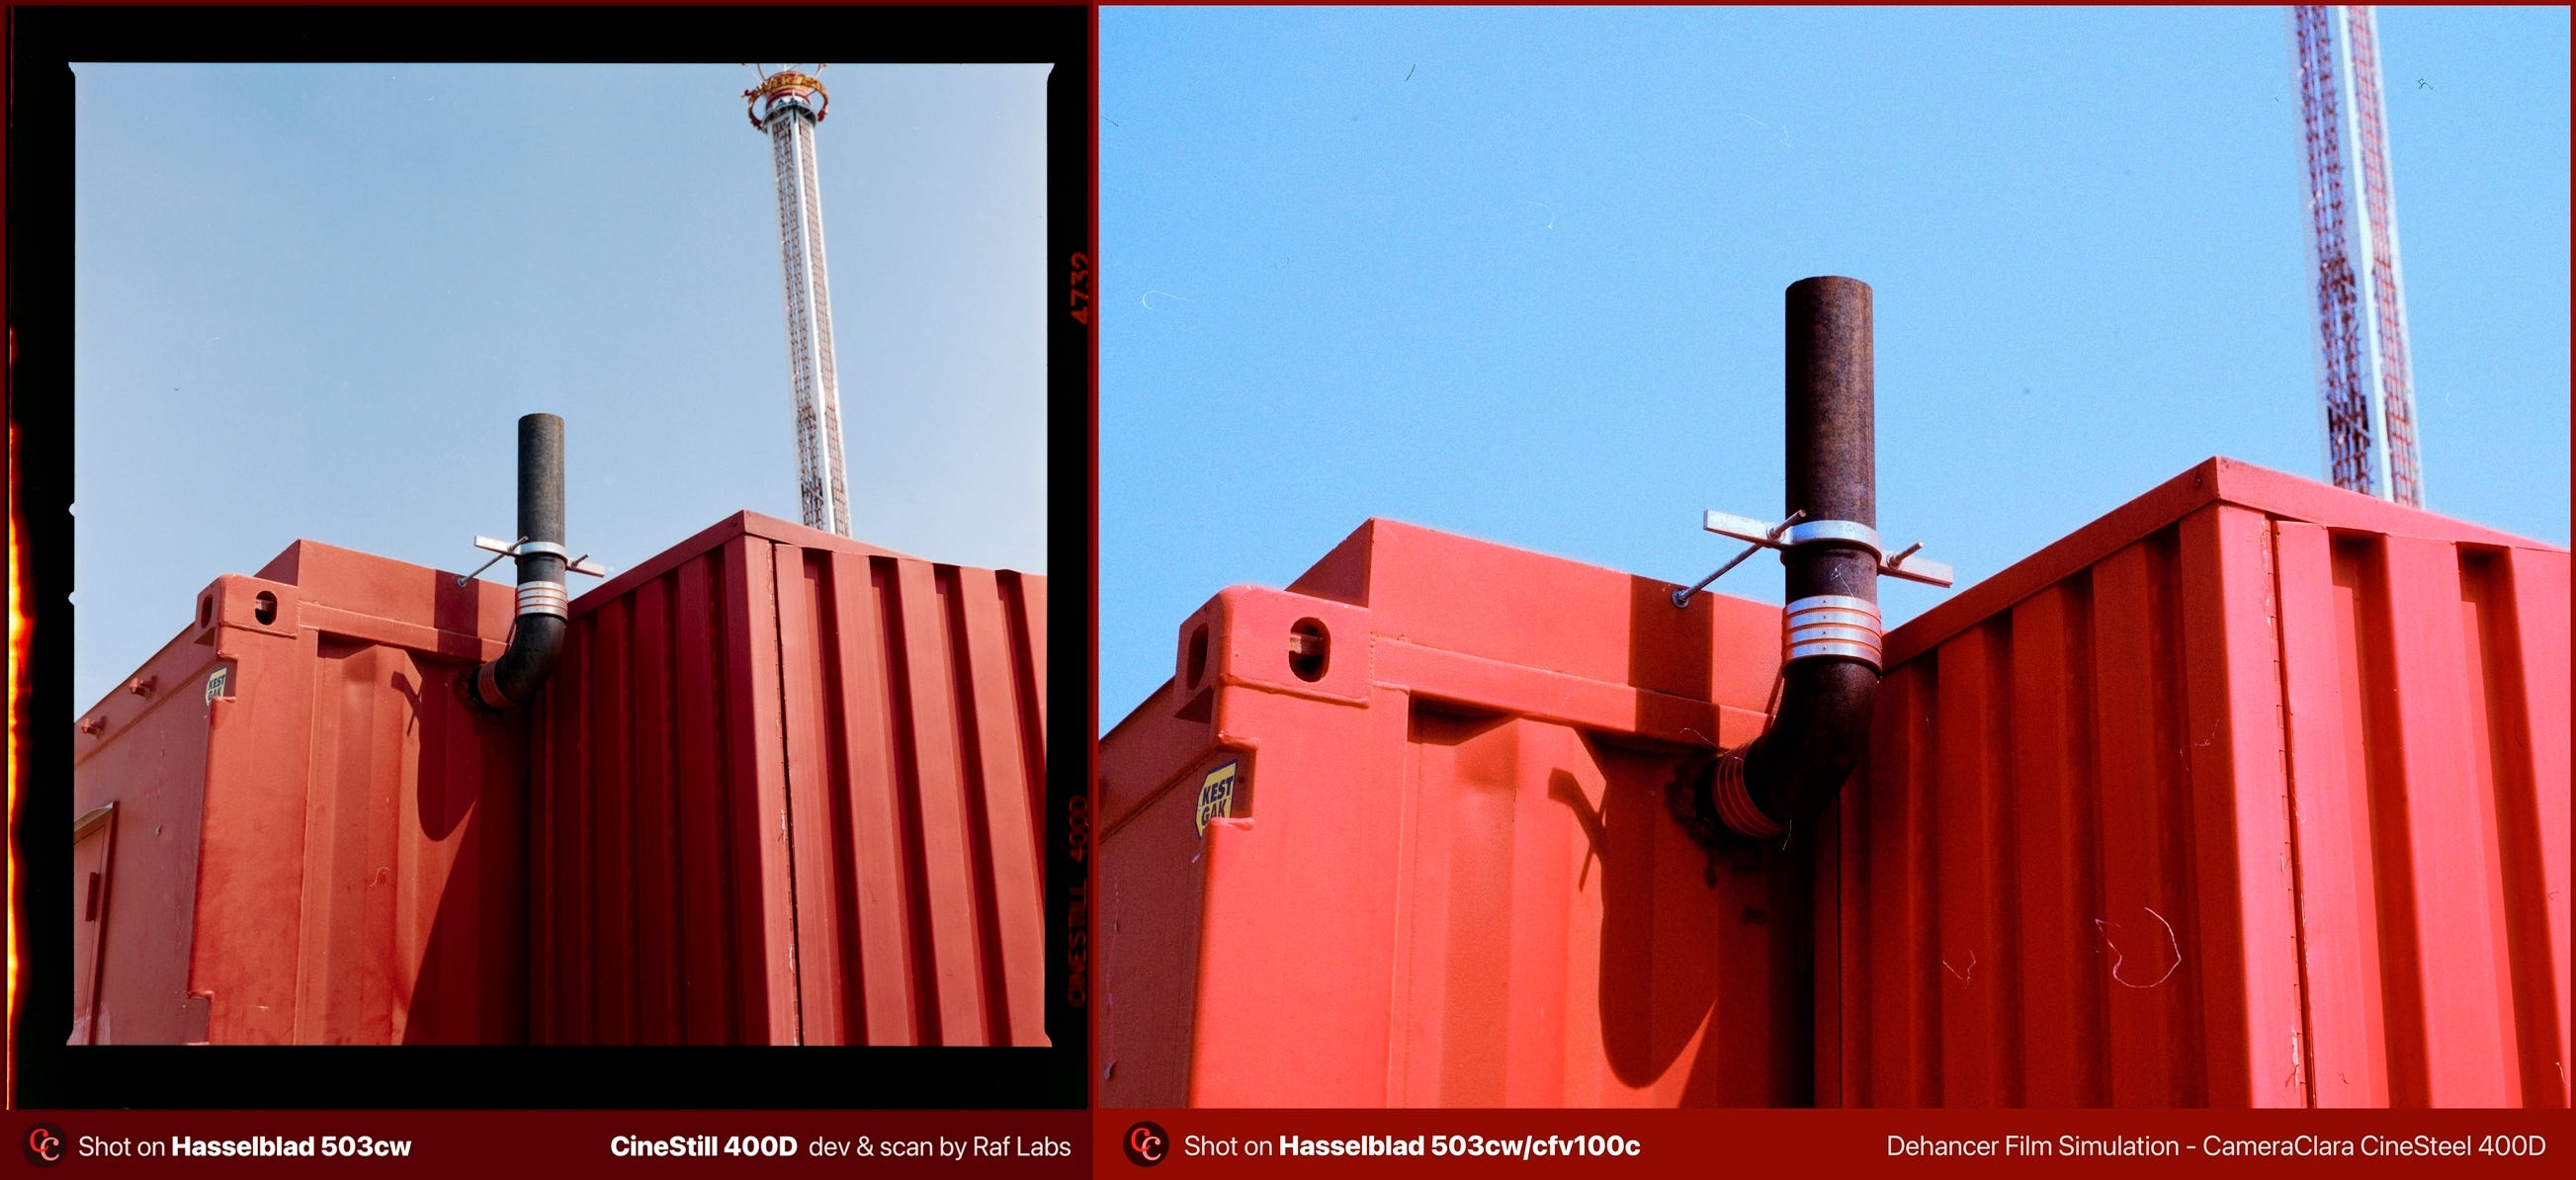
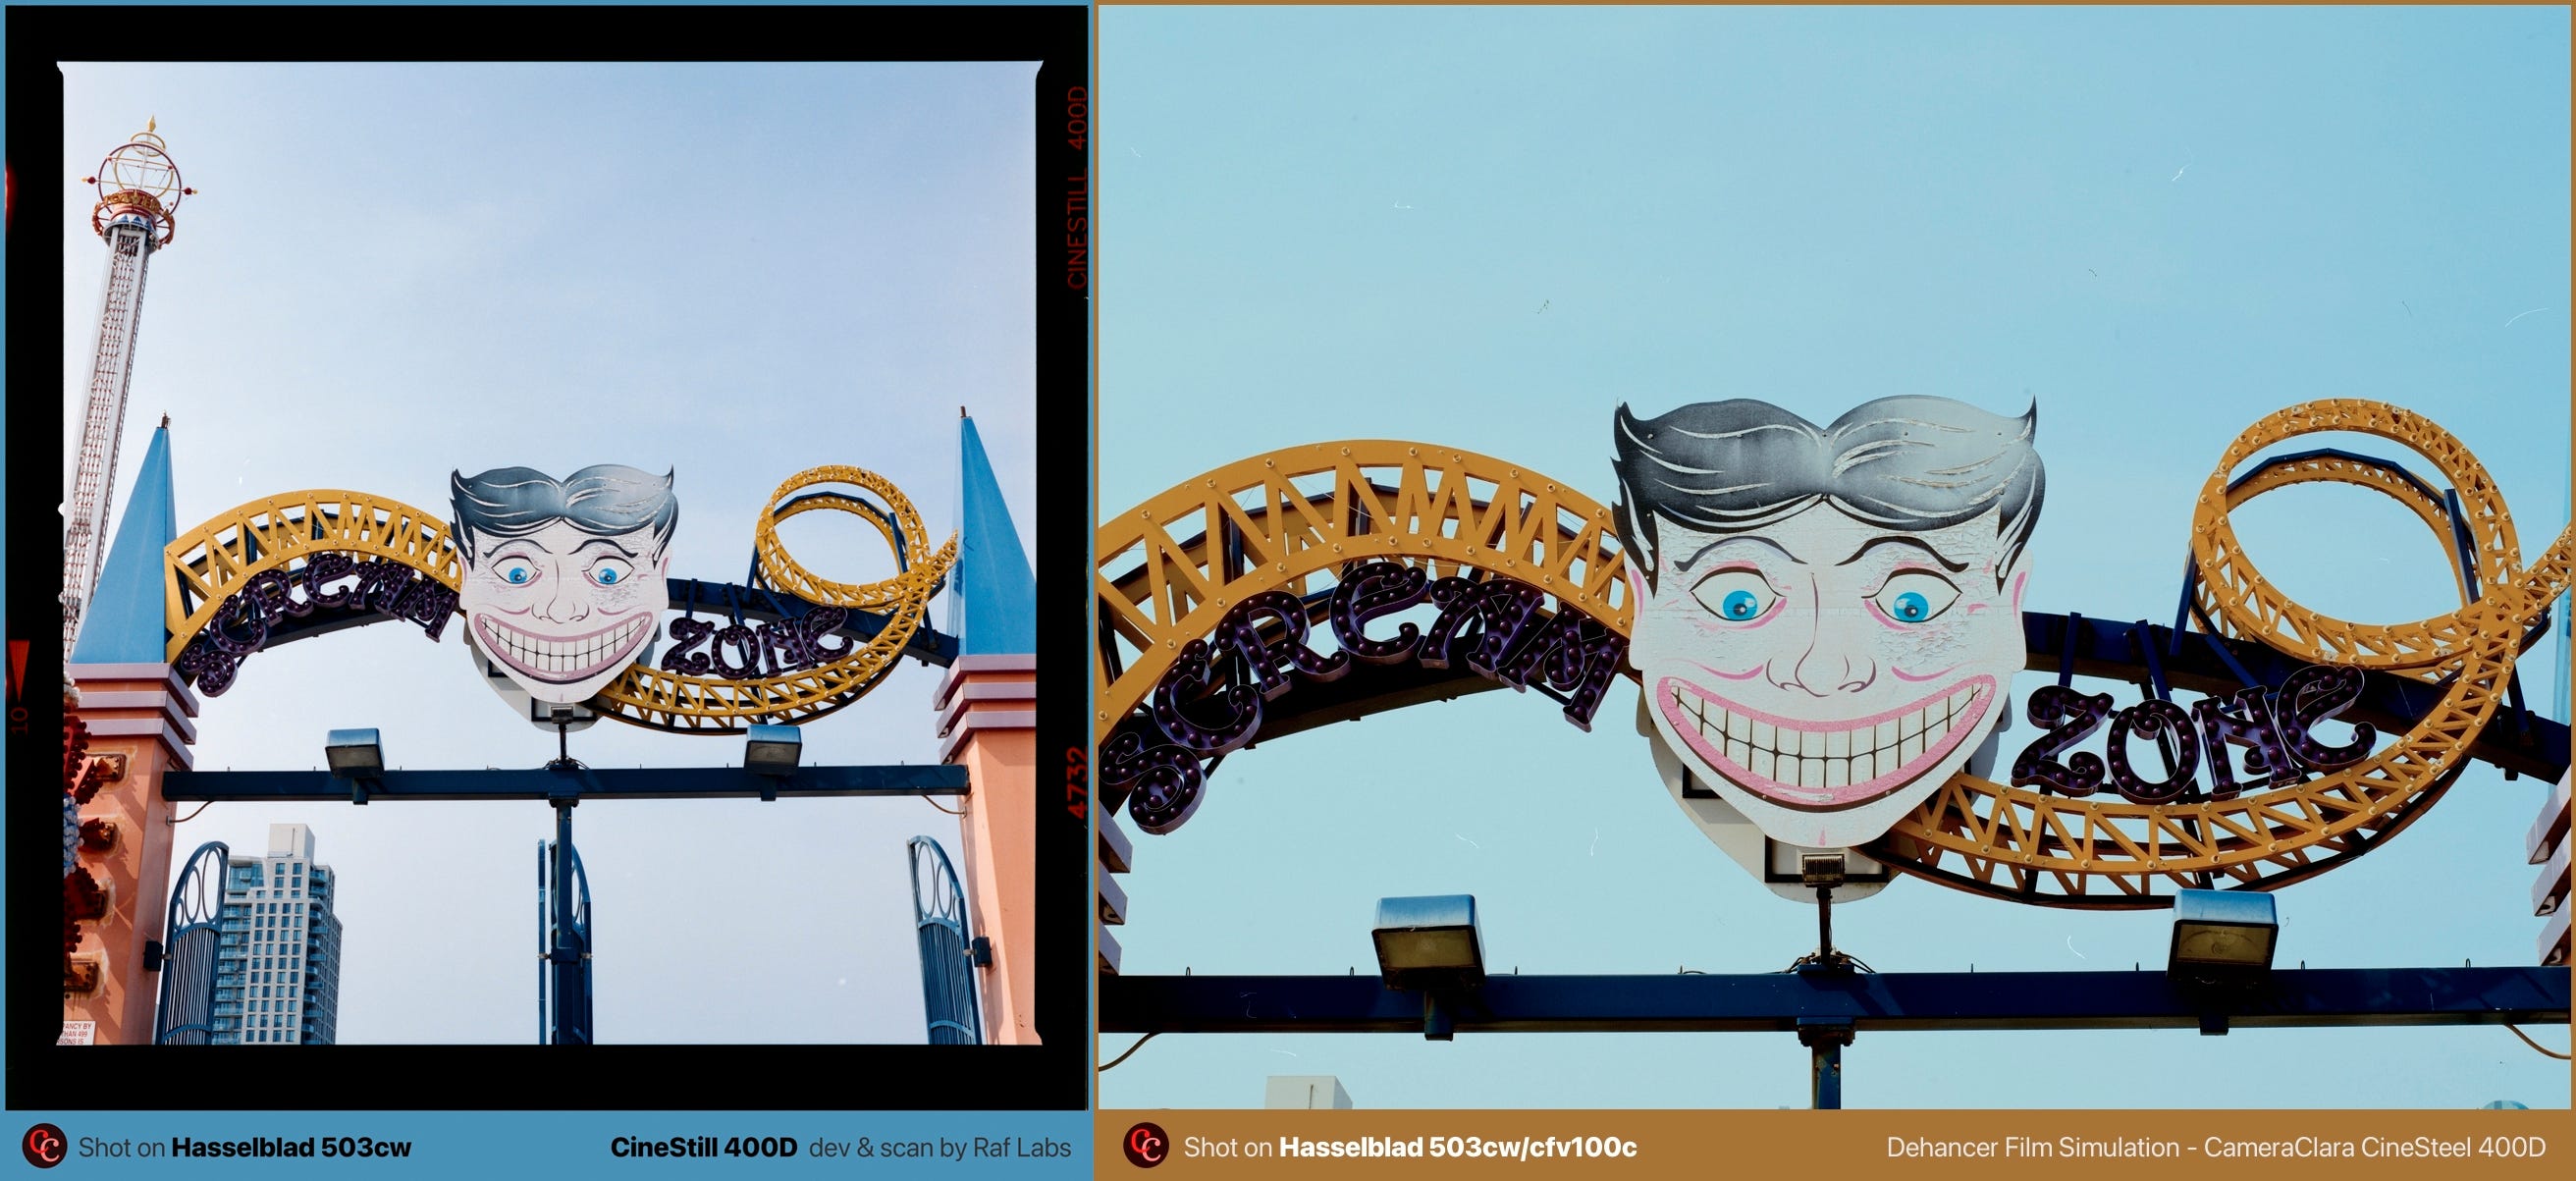
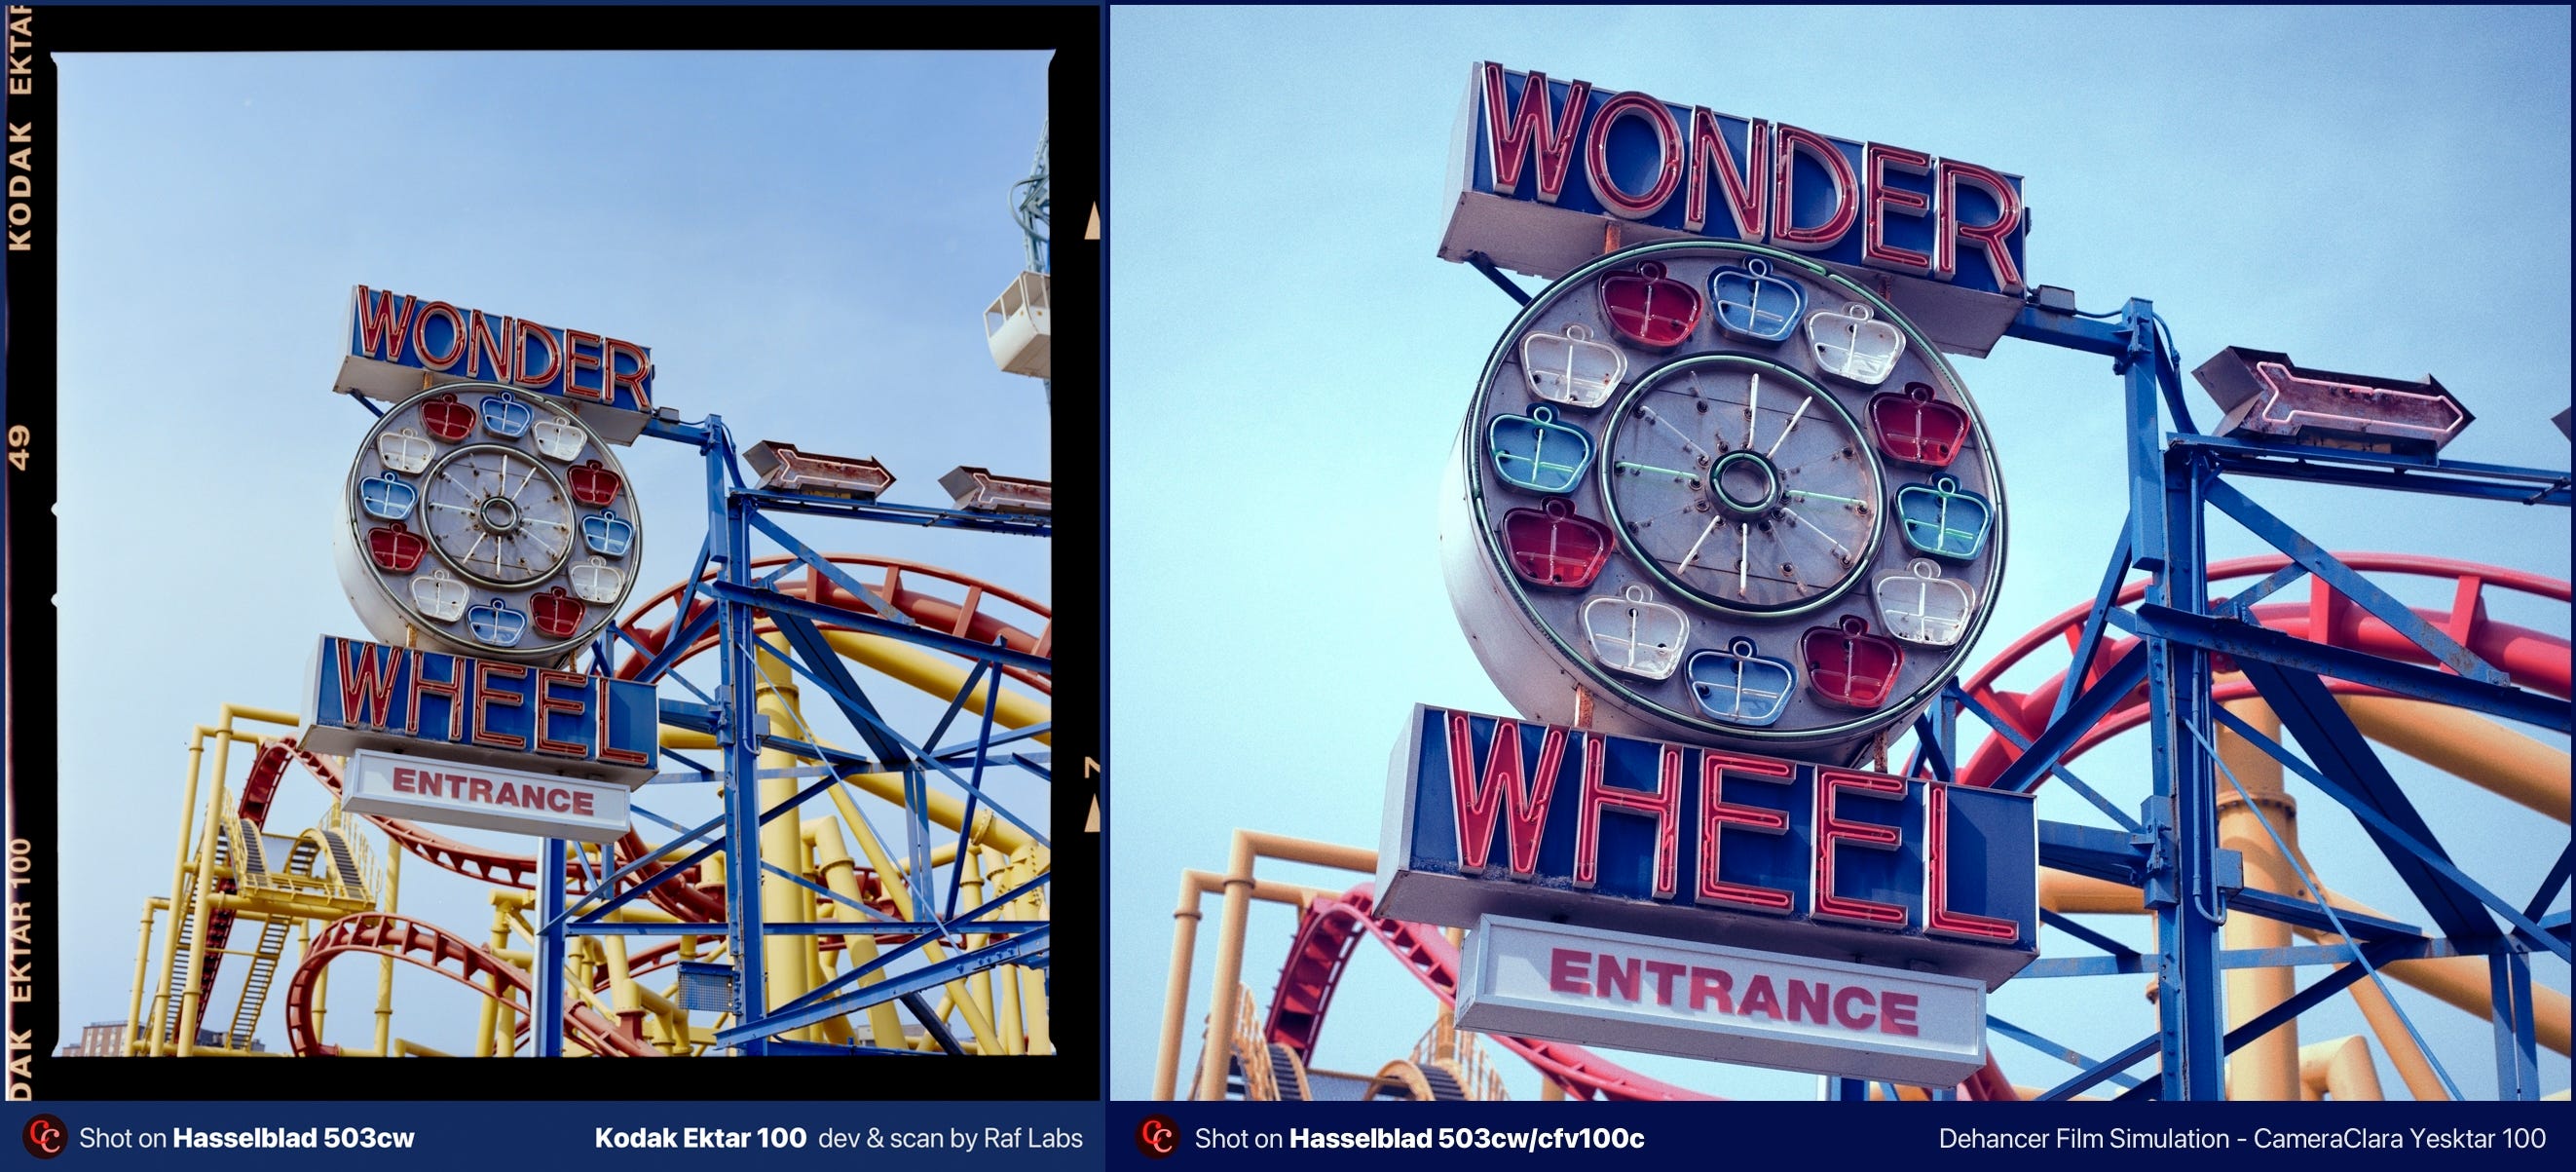
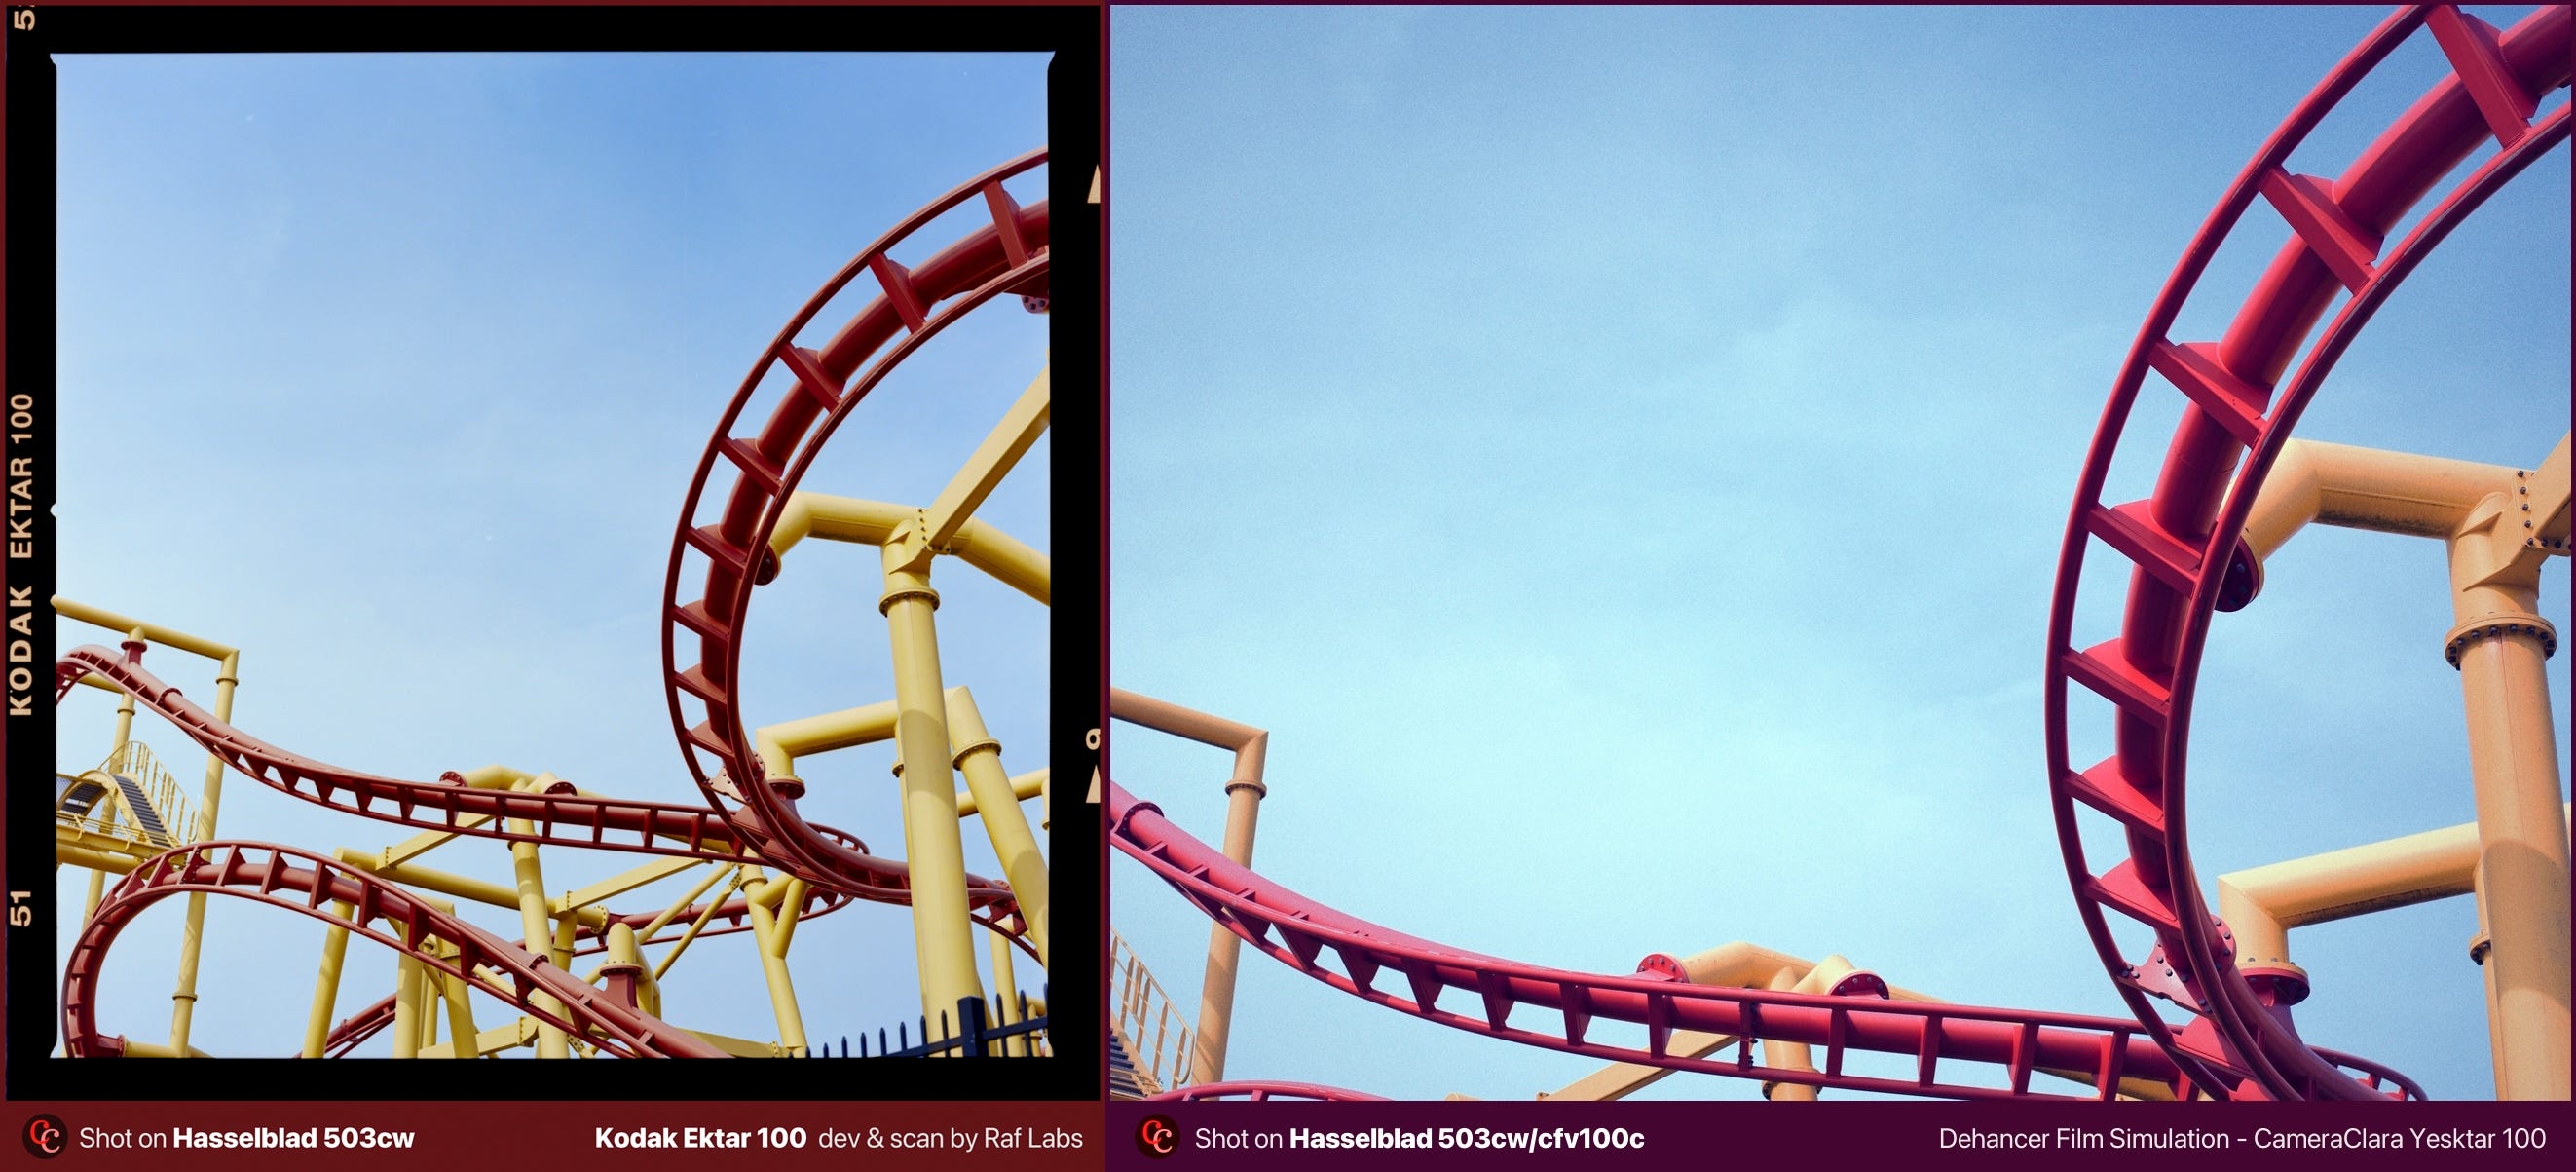
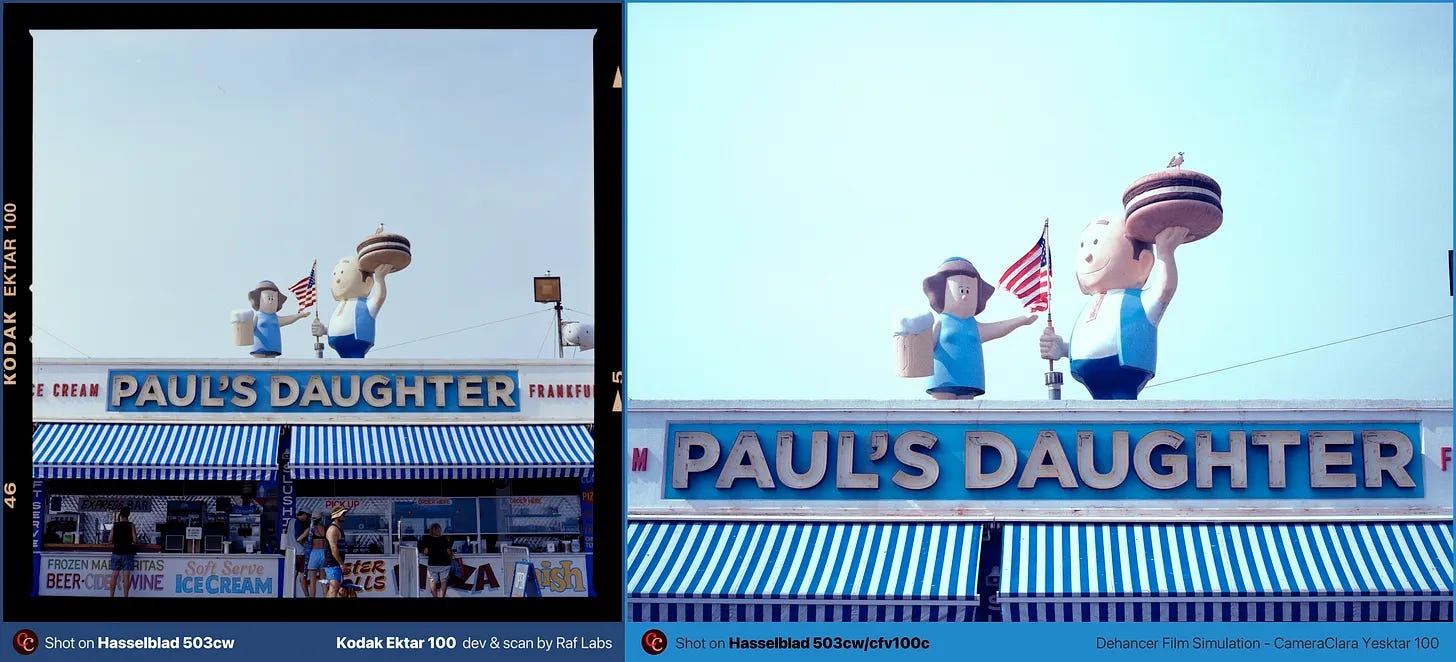
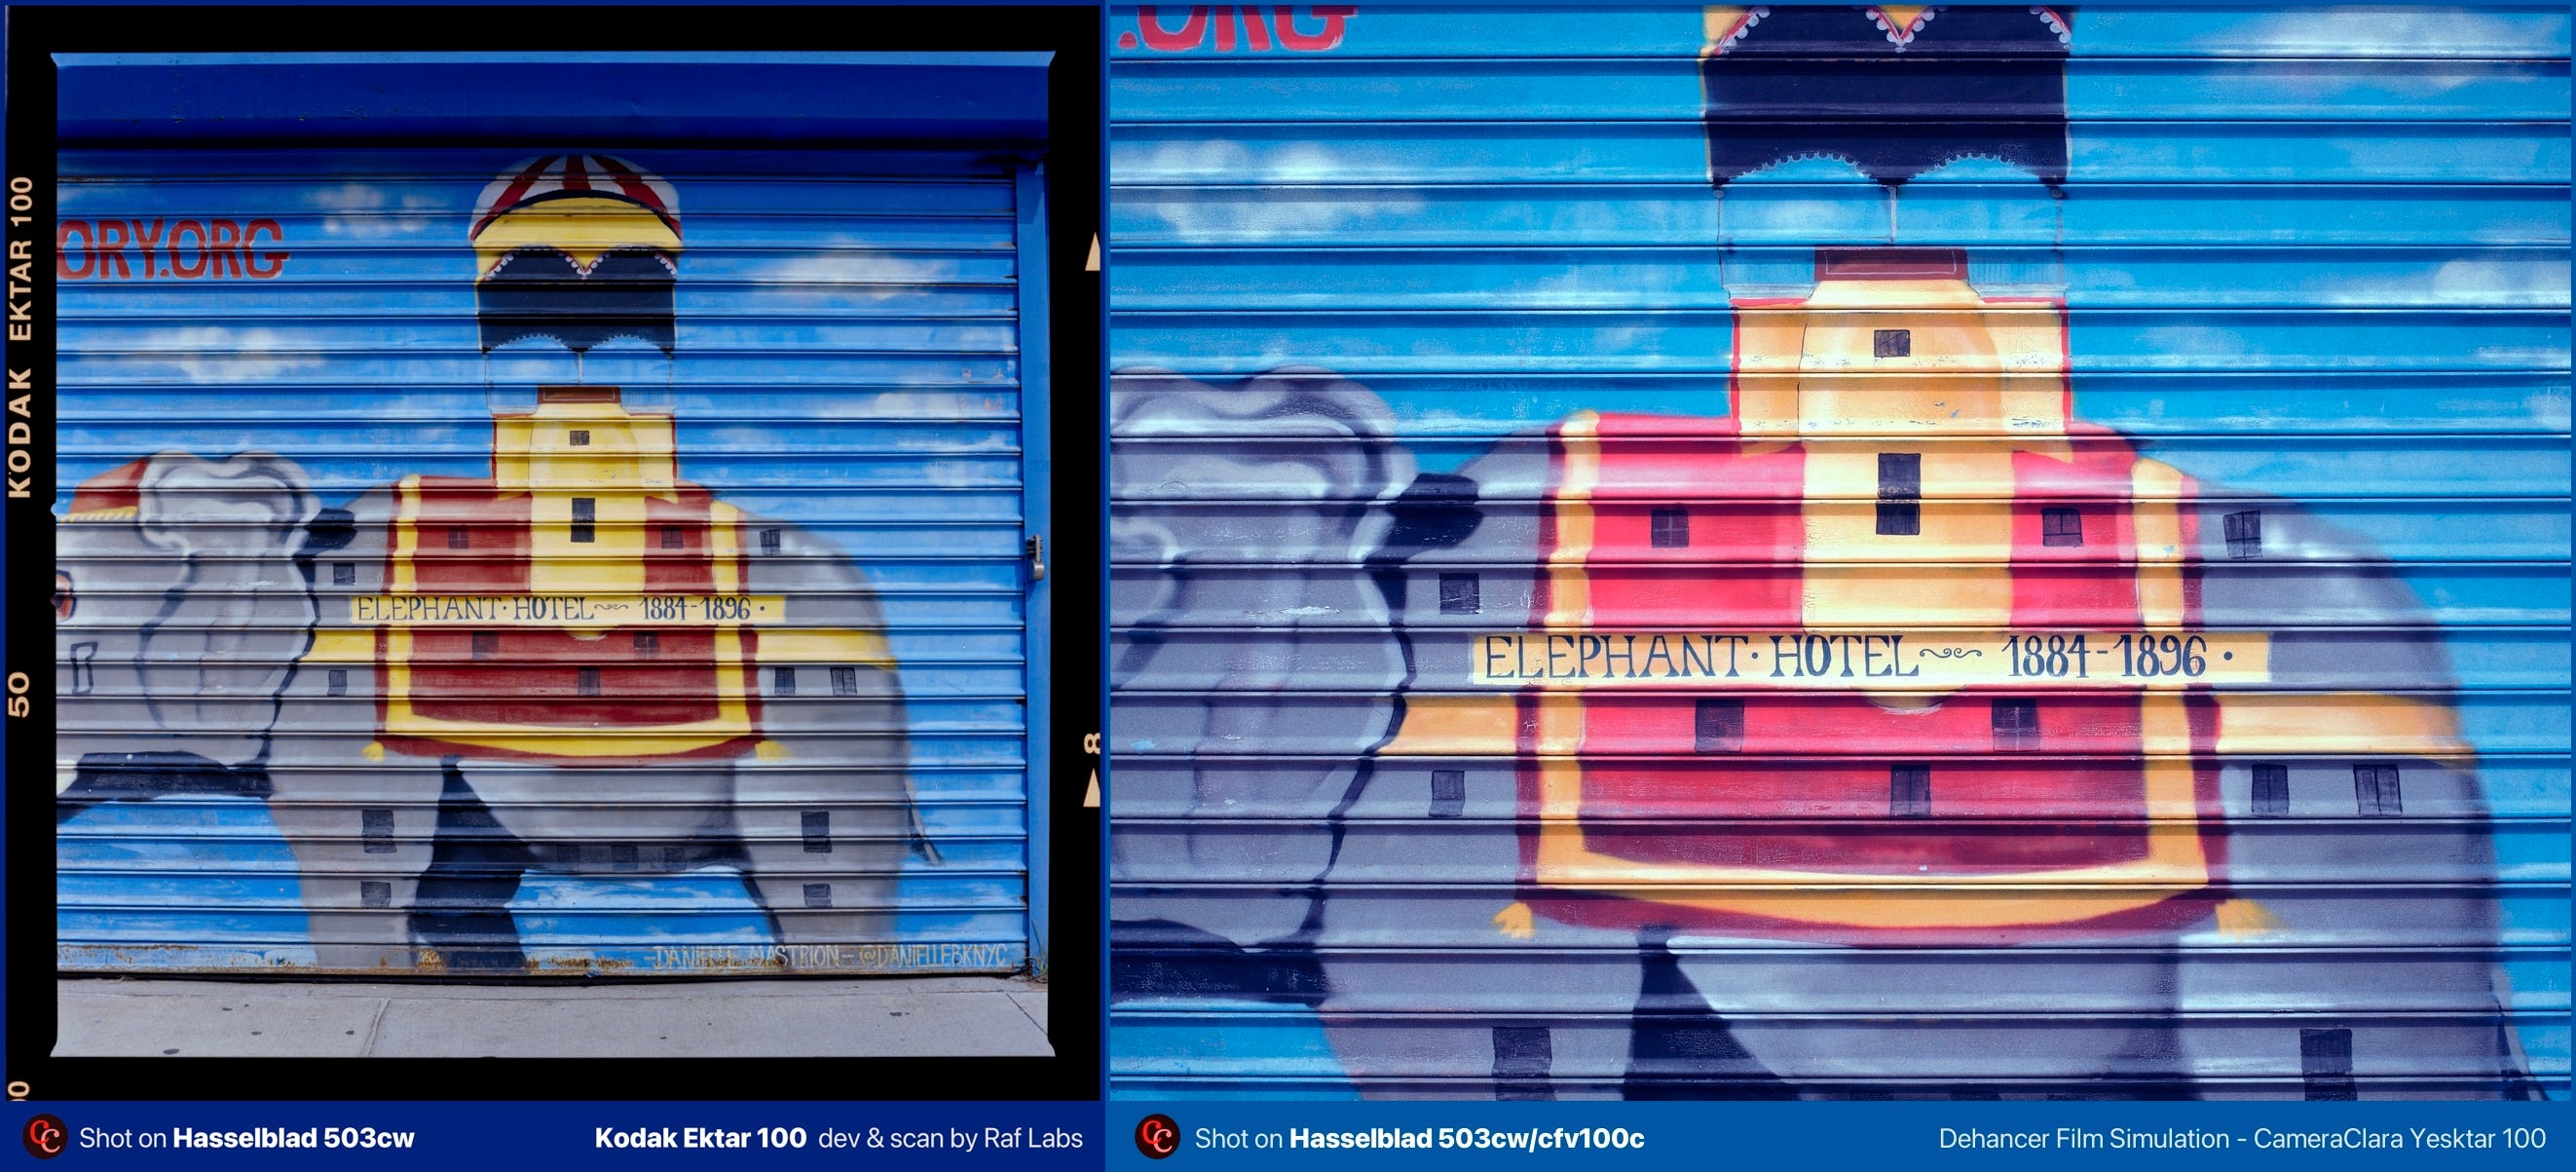
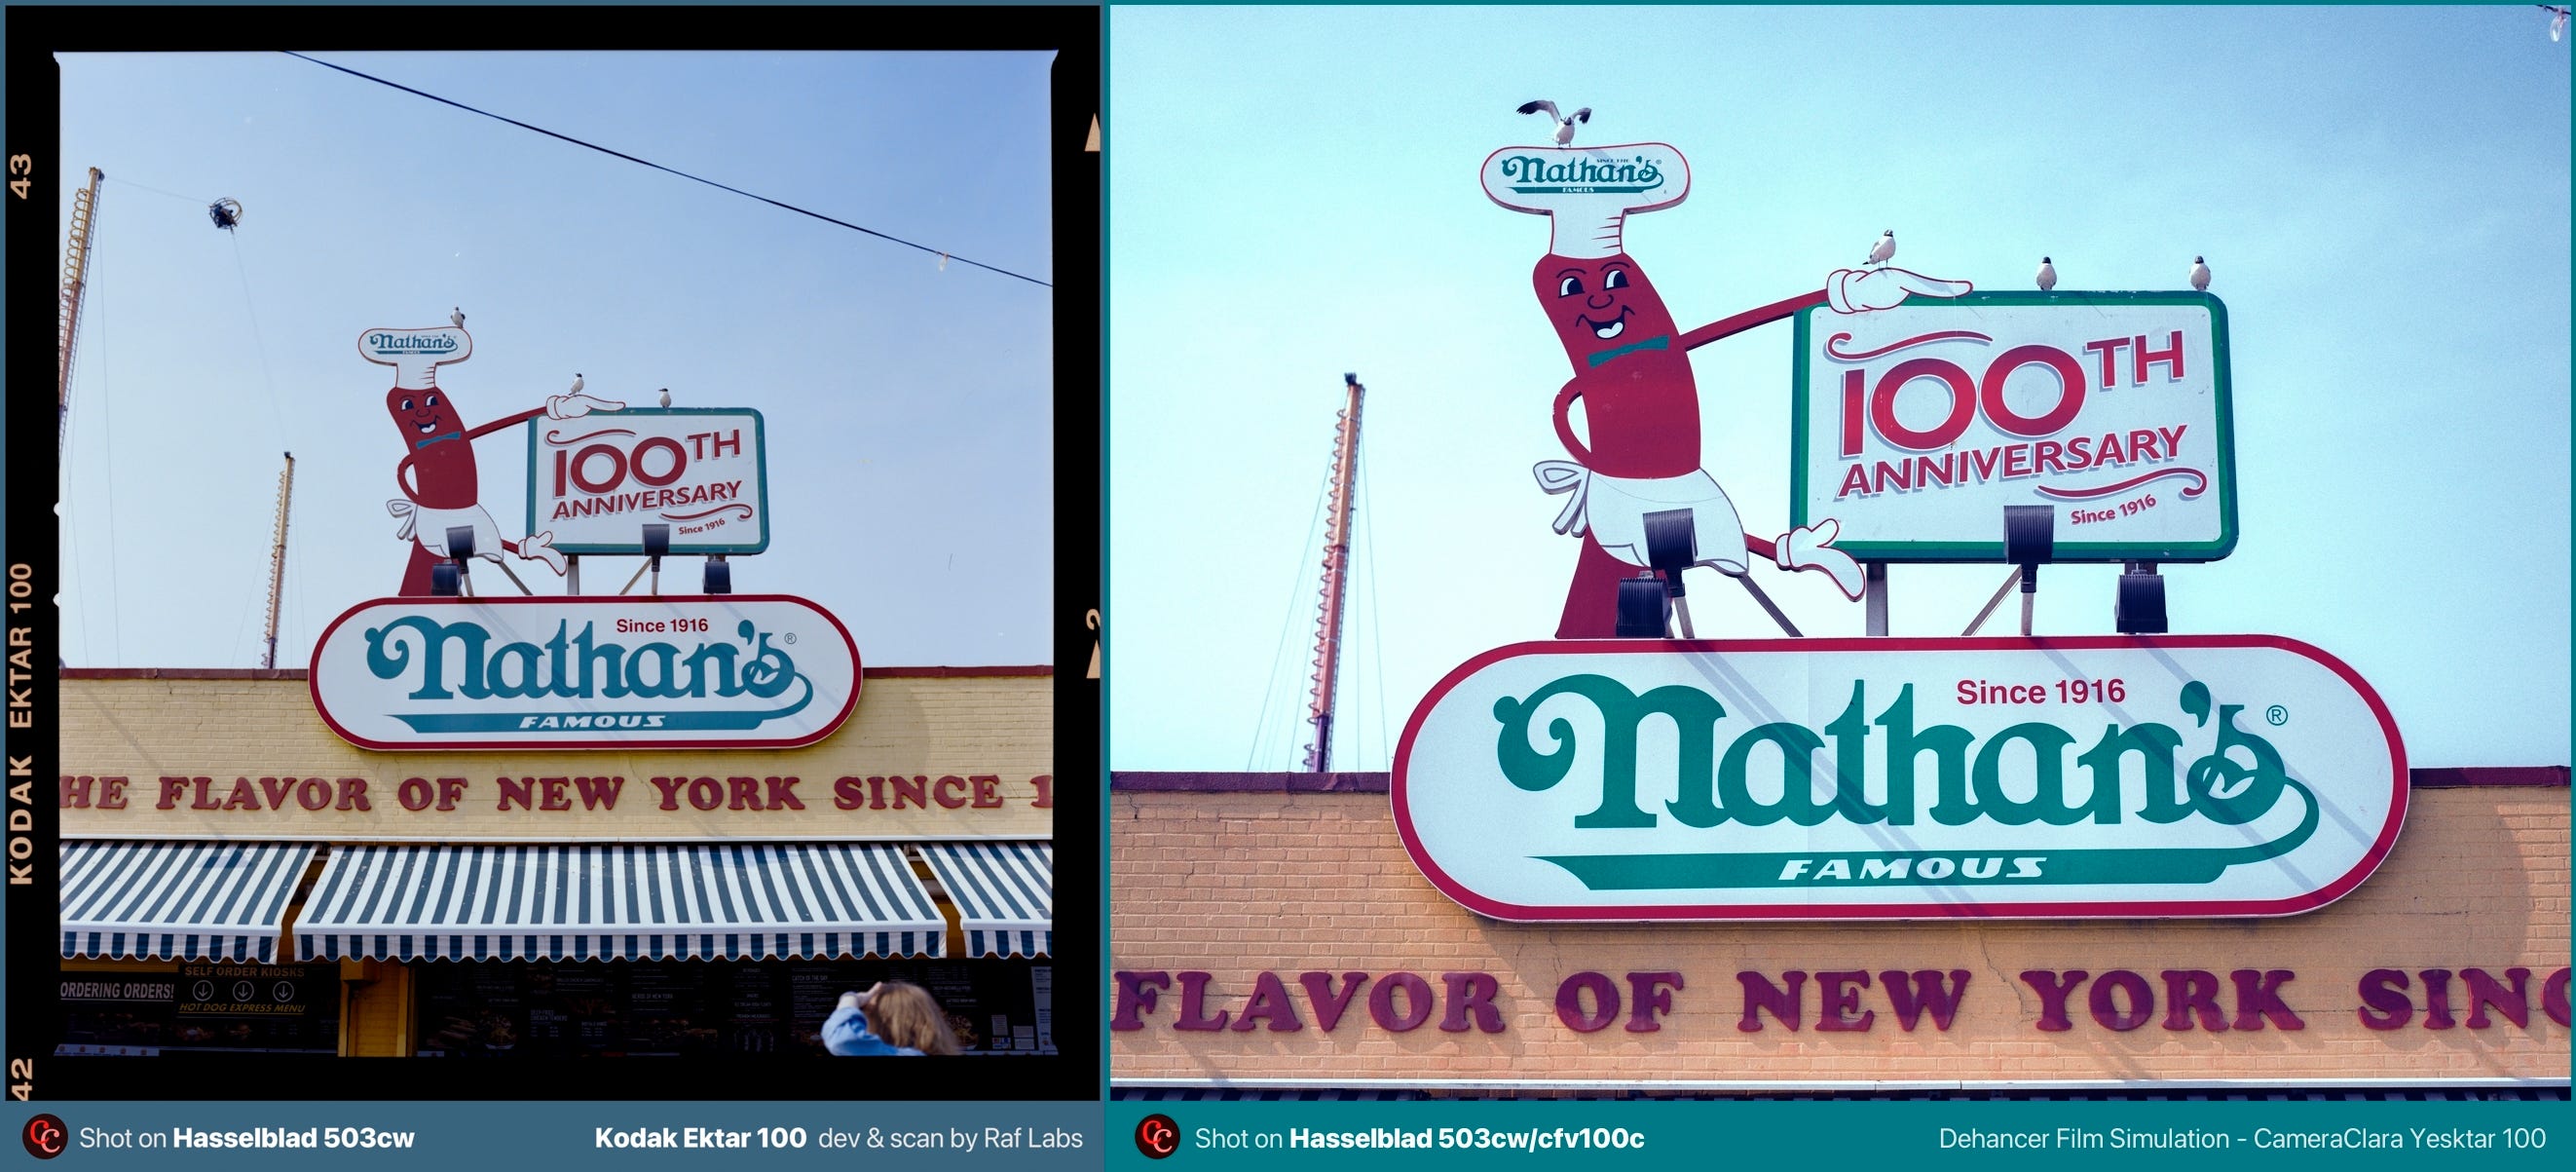
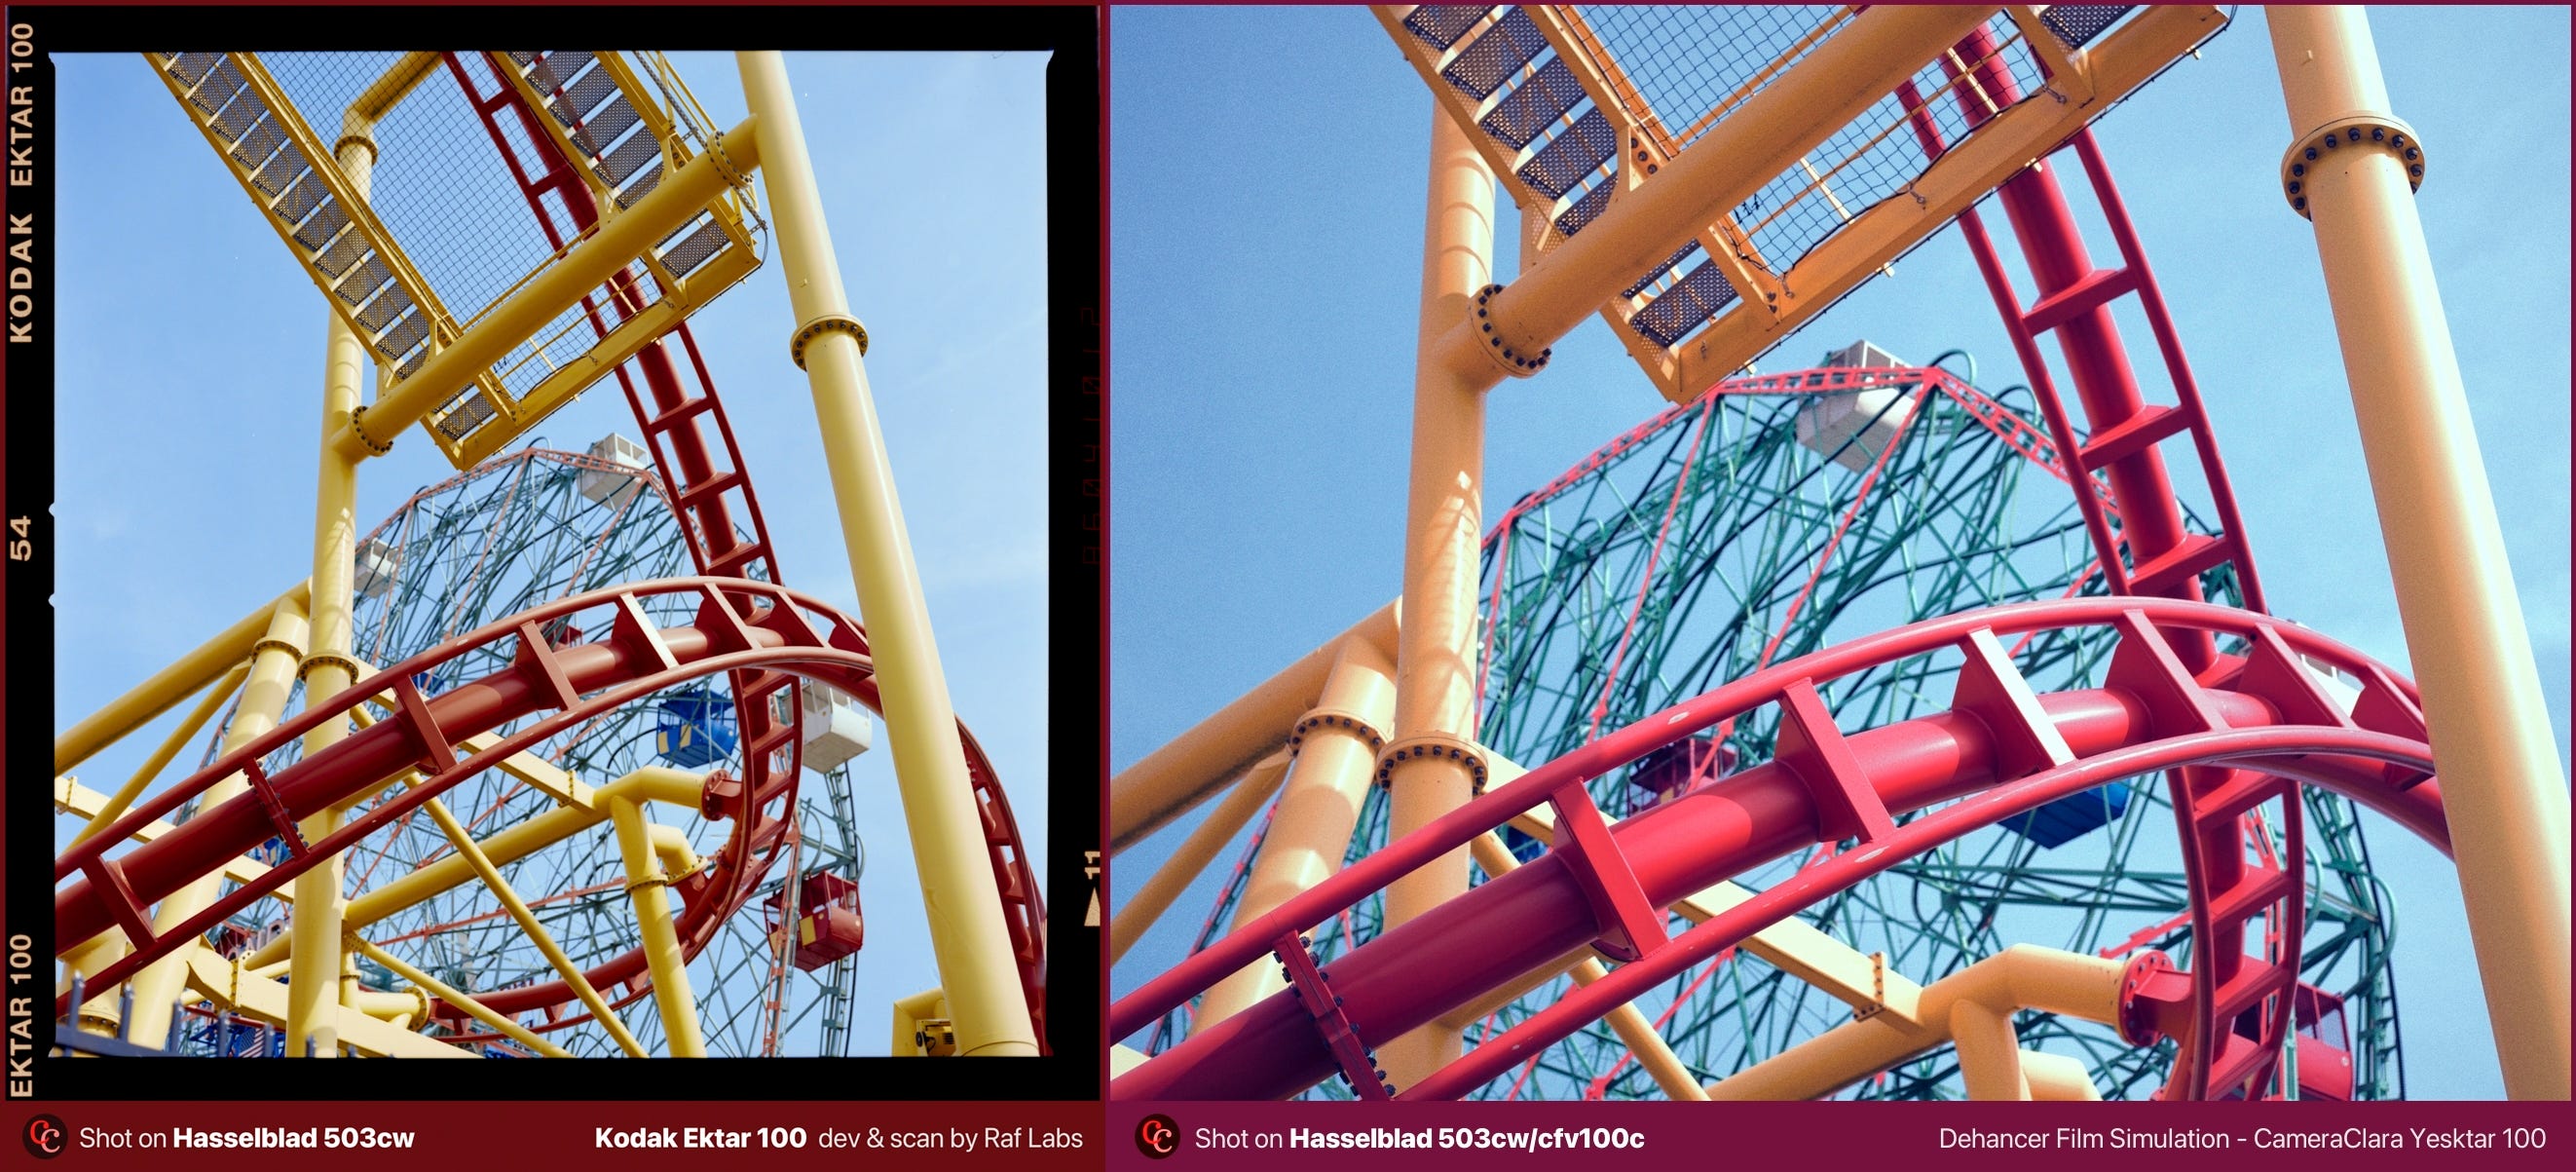
Again, on the left side you will see the real film, and on the right, my film simulations made with Dehancer Desktop. Note that the real film is 6x6, while the digital file has a 4:3 crop out of the medium format sensor in the CFV 100C (Hasselblad digital back), so please ignore the crop.
When seeing the comparisons, also please know that I used the very same preset, in batch, to blindly process all the digital files. I didn’t go one by one fine-tuning according to the film. That would be cheating.
That part is important because what we need to point out is that it’s a single preset being blindly applied to digital files. These files hadn’t been seen and fine-tuned one by one to make the digital file look like the analog one.
What you are seeing is the application of a preset that was, yes, fine-tuned according to multiple files, but applied in batch fashion.
I created two presets, the CineSteel 400 and the Yesktar 100. One is inspired by CineStill 400D, while the other is inspired by Kodak Ektar 100.
CineStill 400D vs. CameraClara CineSteel 400D
Kodak Ektar 100 vs. CameraClara Yesktar 100

What’s the conclusion then?
Well, what did you think about the comparison between film and film sim above?
If all that sounds confusing and you don’t have an opinion formed yet, I’m happy to share mine:
Film development processes are unique. Depending on the Lab, chemicals, temperature differences, standardization of the dev process, scanning methodology, conversion software, or any other real-world analog variable, you can have different results.
Starting from there, if you ever create a preset that greatly mimics real film, you’ll be mimicking that entire process.
So, if you want to have your own film simulation presets that you can use on your digital files, the first step is to lock all these variables out. If you are doing this yourself, you have a better chance of locking out these variables because you control the whole chain. But if each time you develop your film you use a different Lab, or choose a different scanning methodology, you are far from reaching consistent results.
Once you lock these out and are able to consistently reach a film look according to your standards (either by doing it yourself or using a Lab to give you TIFF scans), you should do what I did: get your film and digital camera, shoot the same scene with the same settings, open film simulation software side by side with your film shots, and fine-tune and create the presets that will mimic your rig.
That’s the only way (if you want consistent and reliable results).
That will give you a film simulation that mimics what the Lab scans, and once you do so, that film simulation preset will only be applicable to that sensor and color science from the digital camera, meaning if you change the camera, you need new presets.
In other words, for a preset to be considered good and consistent, it MUST be locked to the equipment it was taken with.
If you do that, you’ve reached the gold standard of film simulations: something that mimics your analog process and achieves similar (remember: not identical) results from a fully digital workflow.
Again, if you are buying Lightroom presets that promise your RAWs will look like a specific film stock, you are most likely being fooled, either by not understanding what the real film stock looks like, or by just guessing randomly.
If you think your images are more pleasant to look at, fine, great, excellent actually, you are satisfied with a pasteurized color science formula. That’s not bad, and I wish I were satisfied with that as well. I envy you because you are able to be happy with small things, God bless your soul!
A philosophical debate about the outcome and comparison
Looking at real film and its simulation side by side made me reflect on some things I want to share, mostly because we feel tempted to compare, or even misjudge the film simulation as “not the same” (hence inferior), or feel tempted to, on a biased judgment, elect a better one…
I don’t think they should be the same, I don’t think there’s a better one, and that’s the discussion I want to promote here…
Film is film, digital is digital, and it’s fine if you only want to work with film. It’s also fine if you want to apply film simulations. What’s not fine, I think, is applying a film simulation and calling it real film. That crosses a line.

But you know what? Real film has film borders, and I even wrote about it as well!
The Case for Film Borders: Authenticity or Nostalgia?

There’s something about film borders that feels… authentic. The sprocket holes, frame edges, and text markings serve as reminders that the image is a tangible thing—a piece of film that passed through a camera, was touched by light, developed in chemistry, and finally digitized.

Today’s world is polarized, and we tend to compare media to elect winners, and I don’t think that’s the case here. As I said, film is film, digital is digital. To me, there’s no winner, there’s no better. Each method is a different journey.
I personally like the film look, and sometimes I apply film simulation to my digital files, but I either don’t say anything, or if I do, I explicitly say it’s a film simulation.
Well, I think that’s it! I hope this article left you with something positive from this look at film simulation for digital files, and the philosophical implications of it. Please comment below and join the discussion about this (very hot) topic!

Please consider subscribing to Camera Clara for more articles right in your inbox! Quality over quantity, with the forever love for film photography and its techniques. With a paid subscription, you can shoot me a DM anytime, and we can arrange video calls where I can help you with your photograph needs, let’s be friends.

A fun read. Rigorous analysis created in unpleasant working conditions. That is pursuit of passion. I do hope you had a good time. You sure deserved it!
While pretty good, I suspect this is still young-ish, and in the iterative development phase. Might improve with modern coding tools. Considering image data reports things such as camera model, firmware version, lens specifics, etc., it’s easy to see a time when emulators will be trained to origin tech, each some level of (virtually) exact comparability. Time will tell if the investment to do that is a viable business model. It might be.
To your preamble, nothing creates an exact rendition. But for a pro needing a precise, repeatable emulator, this might be as good as it gets and will improve.. As a hobbyist, I had my preferred films for which I opened the wallet wide. To be able to buy an emulator for an old fave - tuned to my kit - is something I would buy. The good stuff was the good stuff for a reason….
Thanks for doing this.
Steve
It's a great research and love these insights. I recently discovered Cobalt film simulations that work by equalising the sensor out of raw files in order to establish the same starting point before you go on to apply any simulation. And then look into the developing process for that specific film eg in the case of Kodachrome they went as far as tracing down the equipment and lab person who used it back in the days. Basically the last working lab in the world. In their own words, they exposed fresh Kodachrome K25 and K64 to calibrated colour targets under known lighting, developed the film using the authentic K‑14 chemical process, and measured the resulting slides to model Kodachrome’s colour relationships and tonal response. The approach seems convincing, and I feel the results are much less insta filters than average. I will never be able to draw a 1-1 comparison ofc but I am not a purist even, as long as the result look convincing I am ok with it.