

Working techniques for dealing with film warp
Nothing more frustrating than having trouble scanning warped (or cupped/curled) film. Fix that scenario by solving that problem with these two simple techniques.

Film cupping, or warping, happens for a bunch of reasons. It can come from the way the film was stored, humidity and temperature differences during the dev process, the drying, or who knows what. What we know is that it’s a frustrating problem, and it usually gets worse the larger the film gets. When I shoot medium format (120), I sometimes end up with rolls that look like the back of a guitar neck.
Leaving them inside books isn’t usually an option, because you need books long enough to cover the whole length of the film (God forbid you use multiple books). Laying it on a flat table doesn’t help either, because you need the table for something else. And besides, books are meant to be read, not used as shelves, door stops, or anything other than read.
I tried a lot of techniques to unwarp film, some of them drastic and shitty, like ironing the film with a towel over it. That destroyed the emulsion every single time. I searched online, including forums, YouTube, and Reddit, and couldn’t find anything that actually worked, just a bunch of crap. That’s why I decided to write this ridiculously simple post.
I figured out two ways to do it passively, without an extra heater, cabinet, blower, or whatever. That helps me keep the instructions assertive and short. Great.
I call these methods the “Backwards Respooling” and the “Backwards Mini Roll.” They’re pretty simple, obvious even, but when you’re desperate with a cupped roll, you don’t think about the obvious.
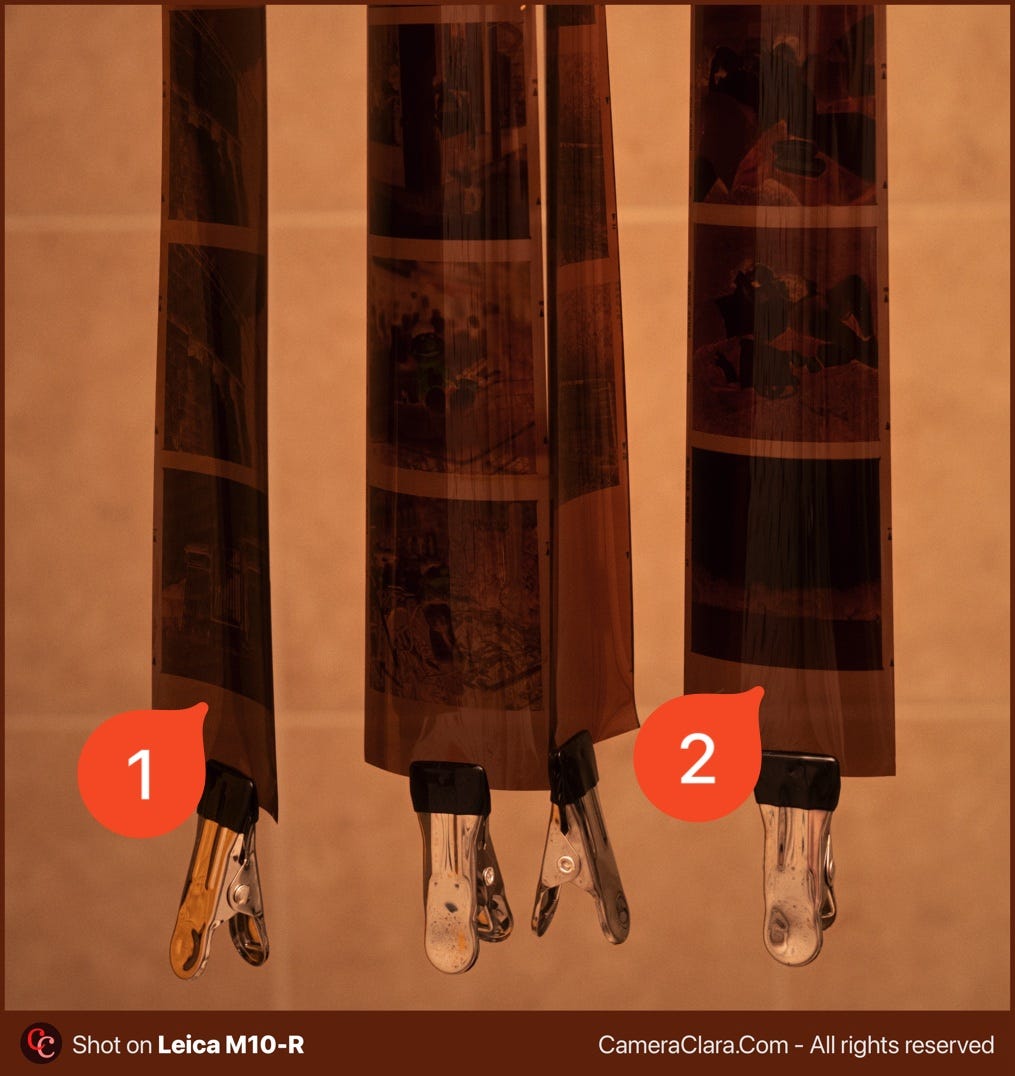
Before we start, let me set the two sides of the frame (no pun intended), so you don’t get confused. Look at the figure below. I’m calling #1 the concave side, and #2 the convex side of the warped film roll.
First, it’s CRUCIAL that the film is COMPLETELY DRY before you try any flattening. With that settled, it’s time for some film chiropractic sessions…
Method #1: The Backwards respooling
For this method, you’re going to roll the film back into the reel, but this time with the concave side OUT (usually the emulsion, but not always). You’ll notice the film doesn’t want to go back onto the spool, because it’s warped and probably conditioned to roll the other way. You might have to route it correctly into the reel for the first loop. Wear cloth gloves for this. Here’s what it should look like:
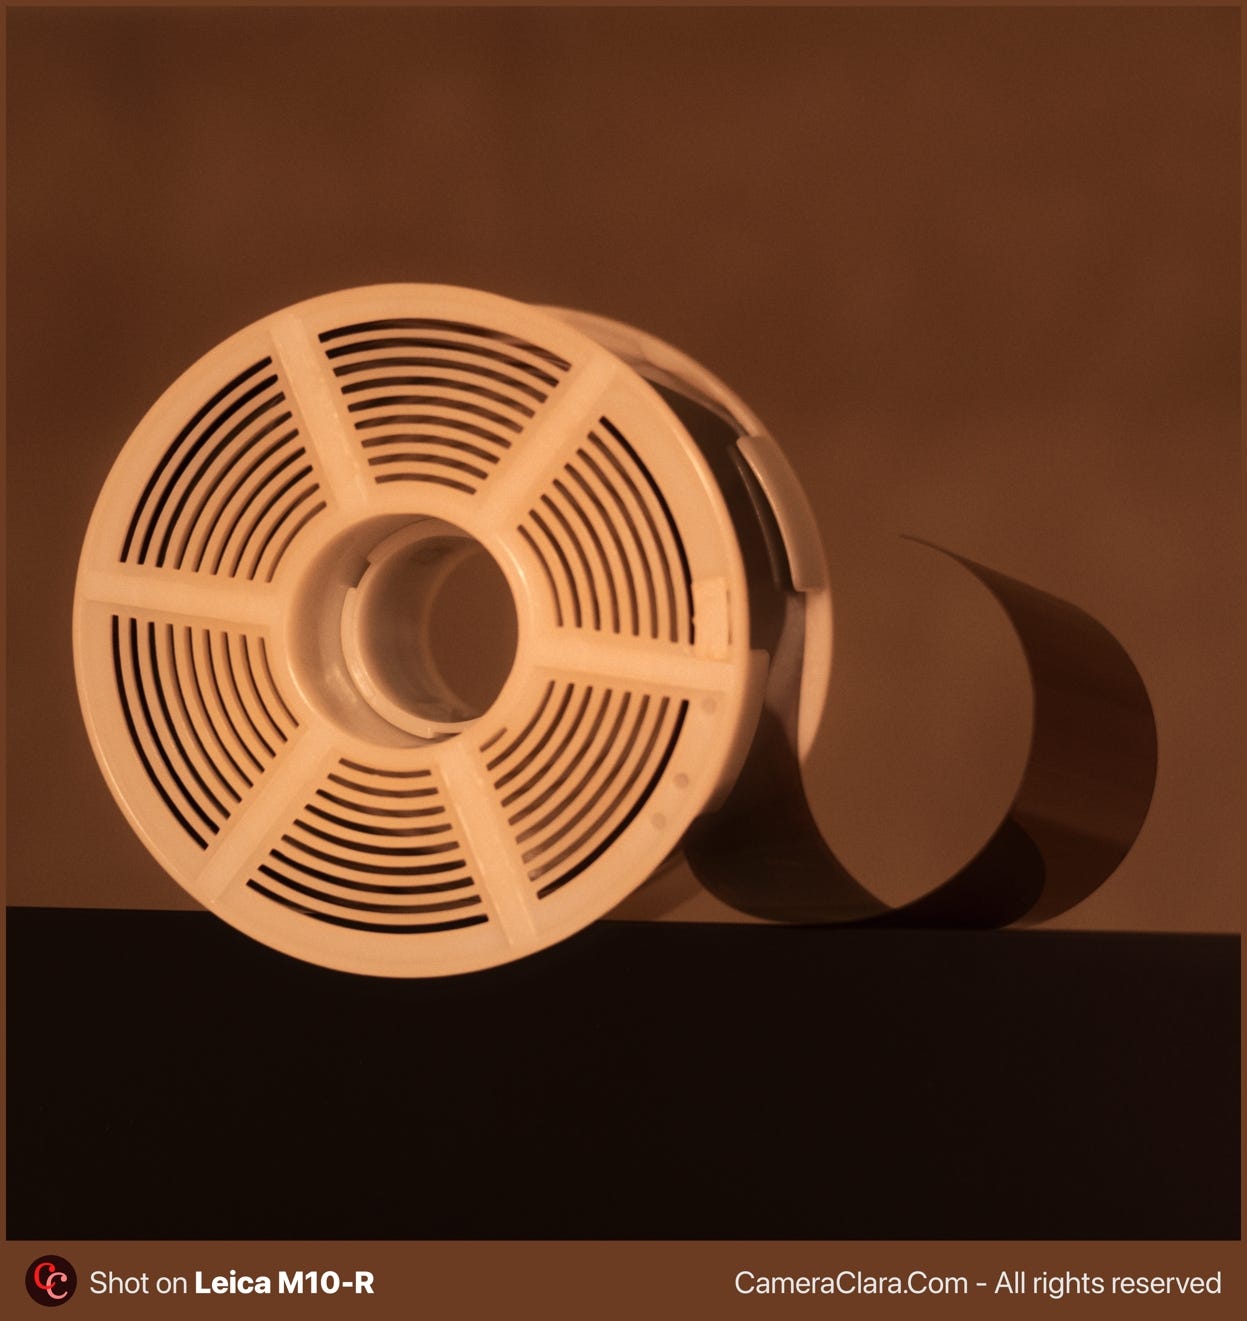
This method is the least invasive and safer than the second one, though it might take longer to work. The upside is that you can monitor the process along the way by inspecting the reel. Finish rolling it with the concave side out and wait. Since the spool holds the film on both sides, it stays flat and you don’t risk overdoing it.
Close the full loop, and wait…
After 16+ hours, you should have a flat film.
Method #2: The Backwards Mini Roll
I’d risk saying this method is a CameraClara exclusive, because I haven’t seen anyone else do it. I came up with it and refined the process along the way.
It’s more invasive, but more effective. Ideal for extreme warps that look more like the third letter of the alphabet (”C”, in case you missed the reference).
Again, make sure the film is completely dry, or it will stick to itself and jam the whole thing.
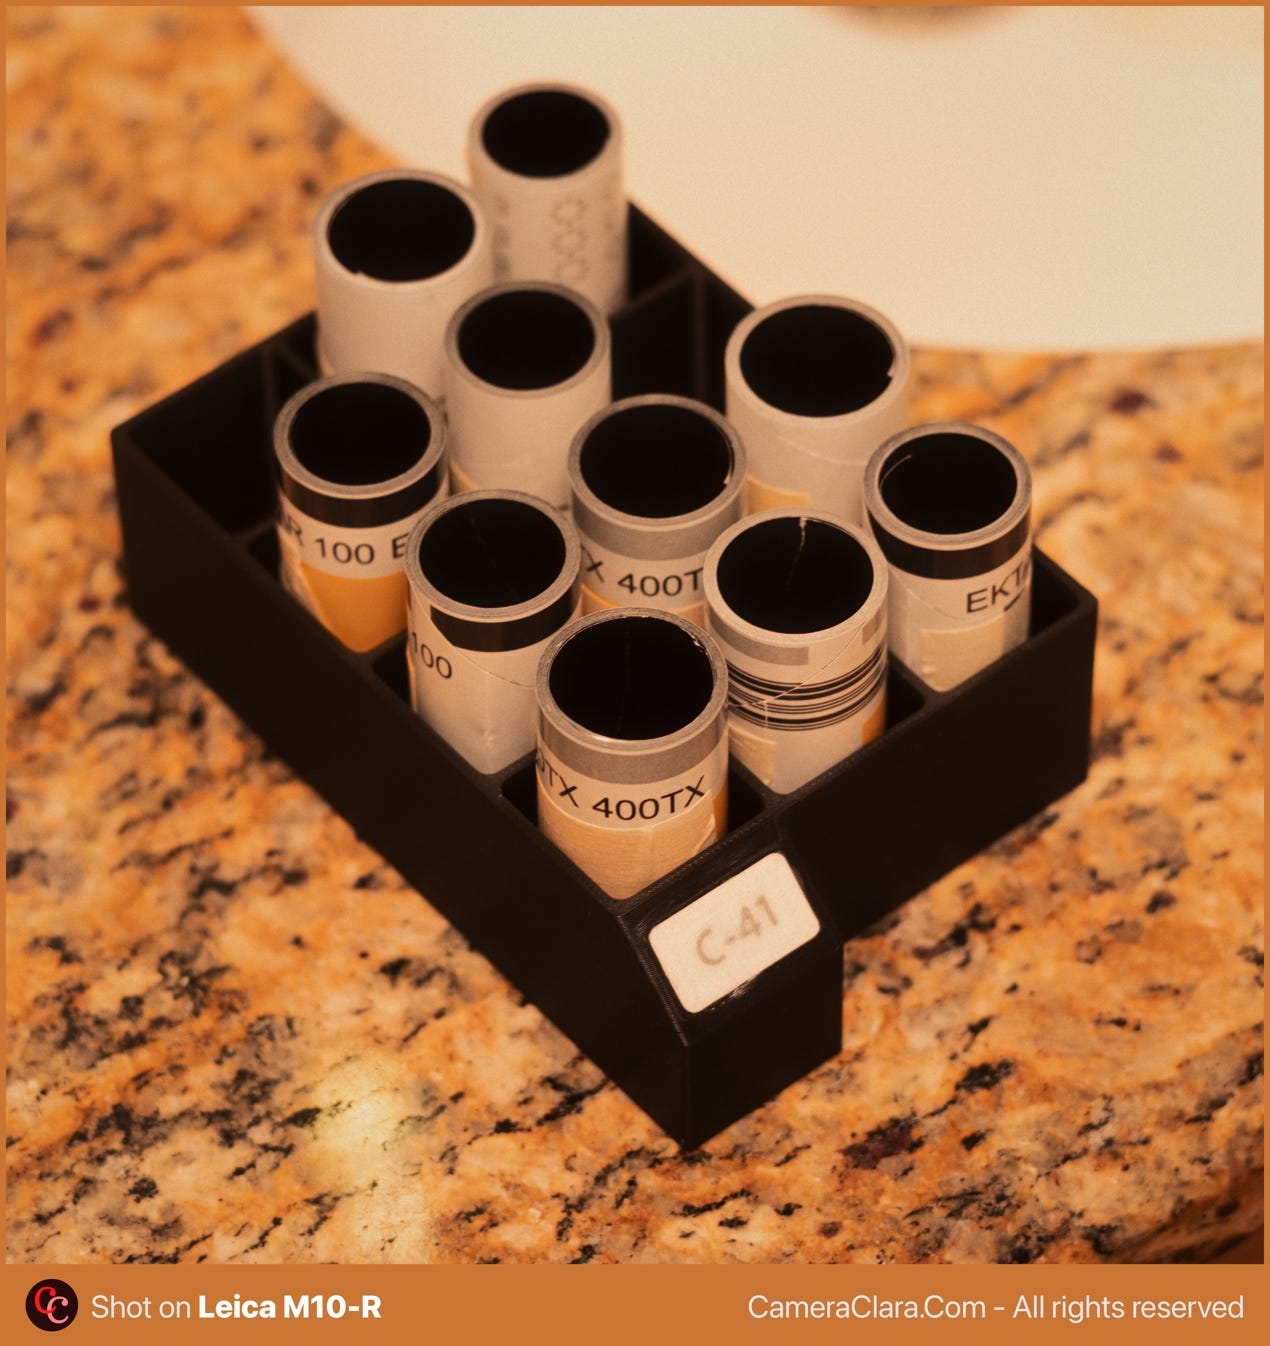
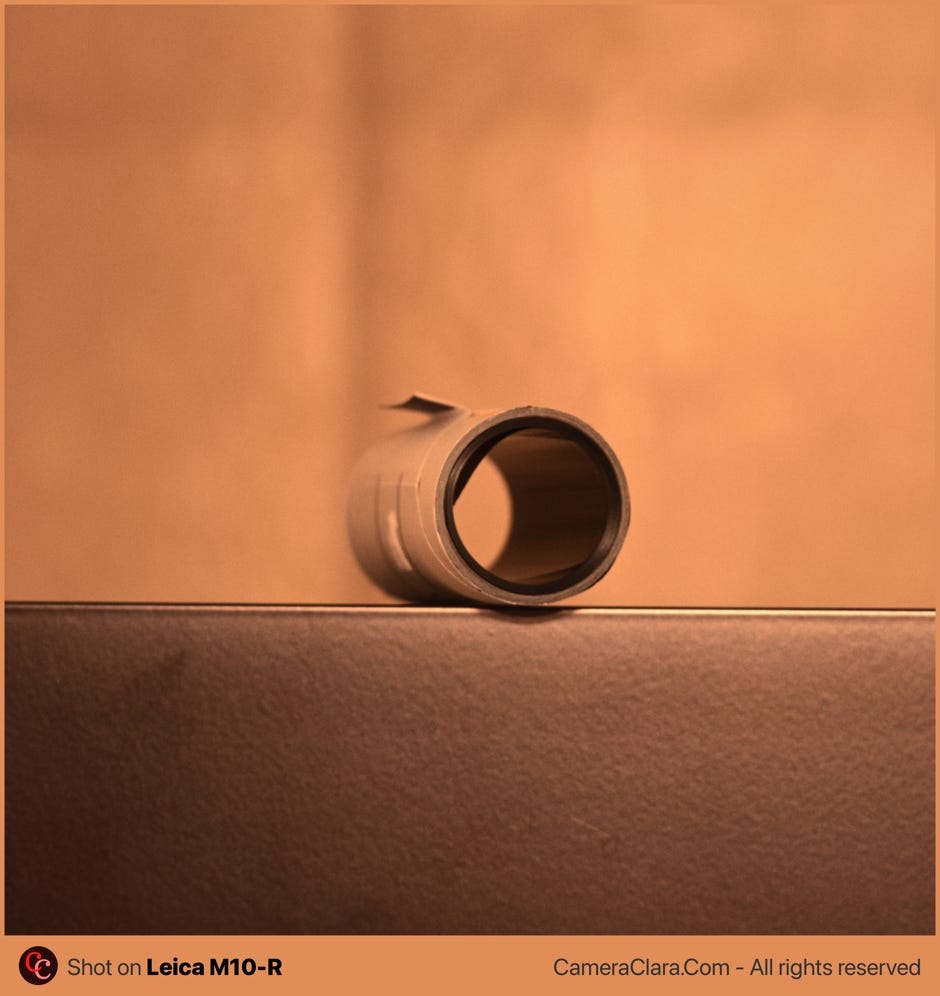
You’re going to reuse the backing paper from when you loaded the film into the spool. Grab the adhesive and form a little roll that works as a container, then build a library of them. Here’s a photo of what RafLabs looks like, for instance:
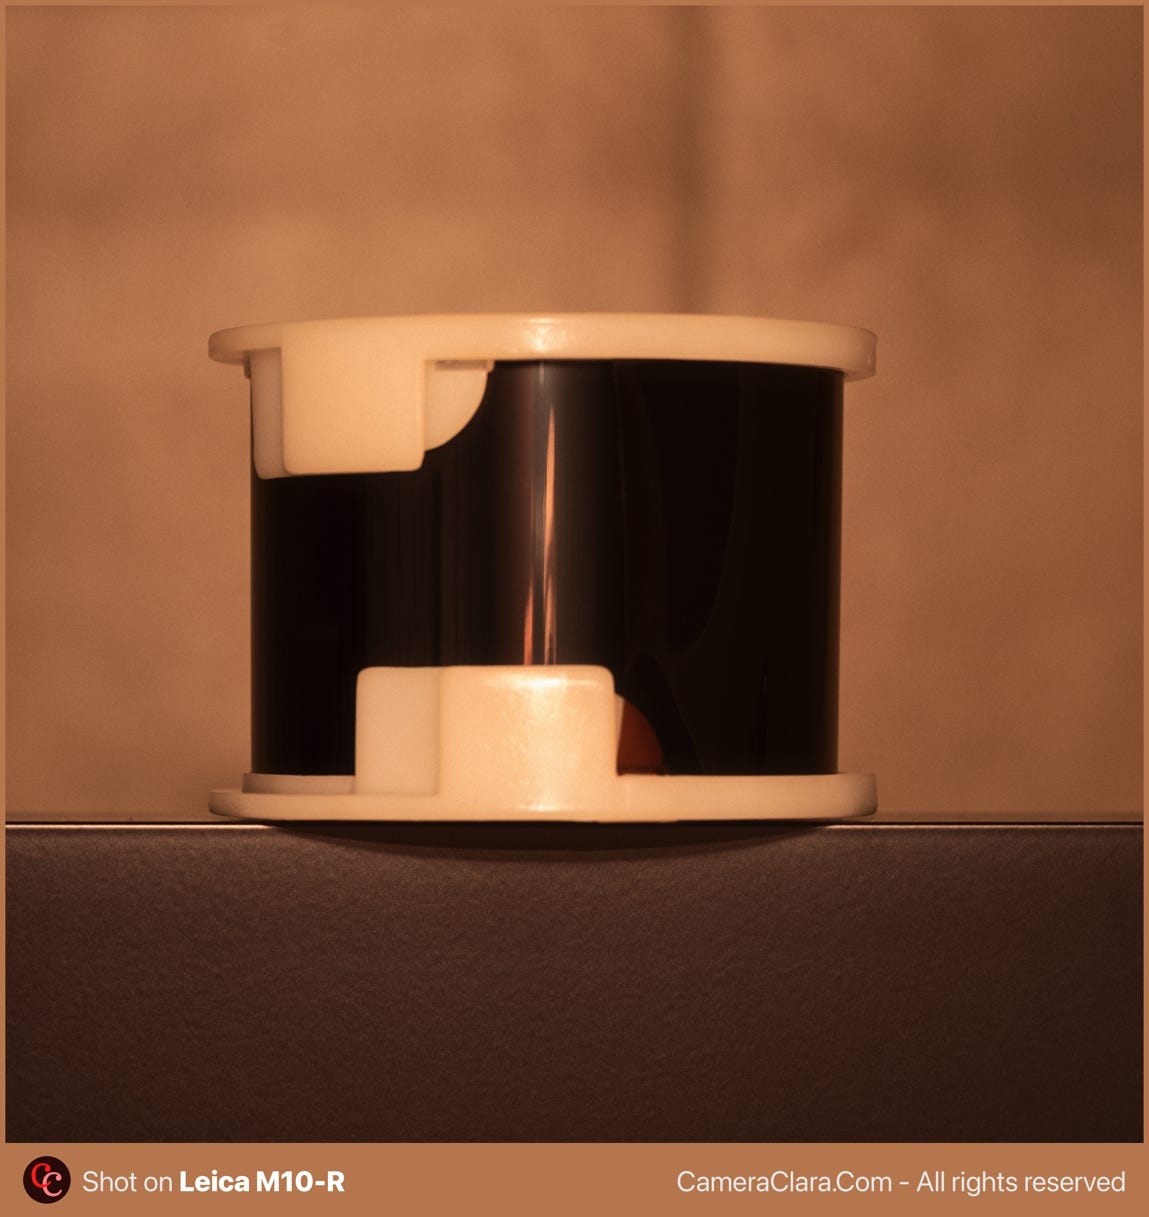
When rolling it back to fit in the cylinder you made, be careful not to scratch the emulsion. Roll it with the concave side out, between your fingers, and pull the tail of the film while holding the other side with your thumb and index finger to reduce the diameter of the roll. Reduce it until it fits one of the pre-made containers.
It will look like this:
Another reason I keep multiple backing paper cylinders is that if I want to open one and inspect, I can just toss it. You don’t want to scratch the film against the paper while it’s tensioned, so to monitor progress you’d have to peel the adhesive and unfold the whole backing paper. You can reassemble it afterward, but it’s just more practical to recycle and grab another one.
When you roll the film to fit the paper cylinder, you might feel you’re doing the wrong thing, forcing it into an uncomfortable position. But remember these films are used to it. They came in a roll tighter than a sardine can, got stored for months (sometimes years, even decades!), and never complained about it on Reddit like humans do.
PS: If you’re doing this with 35mm film, save the plastic tub the canister came in and do it in there. That should be enough, the logic is the same.
Leave a comment if you liked it, disliked it, approved, disapproved, or if you have other techniques. I want to learn and hear from you too!
If you liked this, please consider subscribing to CameraClara, I would be even more happy if you become a paid subscriber, it's just $5/month, cheaper than an espresso. I leave this request for the end of the post to avoid disturbing the reading flow.
Posts are free for 3 months, then automatically Paywalled, if you are a paid subscriber, you have the content forever.
Thanks for reading ❤️
